Everything you need to record & produce music at home
It’s easier than ever to build a home music studio for recording and producing music.
Music production equipment for beginners is often affordable and compact, so the only limits while building a home studio are your budget and the size of your room.
But the equipment you’ll need to make music depends on the style of music you want to make. For example, if you want to make electronic music then you won’t need a microphone or an audio interface, but you will need headphones, a computer, and a program that you can make the music on.
The music gear you need ultimately comes down to the music you want to make.
So we’re exploring what the essential equipment is for recording at home, what’s not so essential, what you’ll need to produce music of various styles… and where you can get it all!
How to record your music at home
The equipment you need to record music at home includes a computer, an audio interface, a microphone, a DAW, and headphones.
While professional studios have masses of desk space full of equipment and cables, this isn’t necessary for a home recording studio. More specifically, you need only get a couple of pieces of equipment to record songs at home.
A lot of digital recording equipment is small enough to sit nicely on a small desk or even a kitchen table. As a result, you can make your home studio flexible enough to work around you.
Where to buy music equipment
There are a number of music gear websites, but I recommend checking out any local music shops in your area too. Here are some examples of gear websites:
If you keep reading, you’ll also find a number of links to affordable gear for home studios in each section.
The list of equipment for recording instruments and producing music
- Computers
- Digital audio workstations
- Audio interfaces
- Microphones
- Headphones and speakers
- Cables
- Acoustic treatment
- MIDI controllers
- Virtual instruments and plugins
- Sounds and samples
But, of course, there are two ways that you can read this article.
If you want to record instruments and vocals:
And if you want to make electronic music or beats:
- Computers
- DAWs
- Headphones and speakers
- MIDI controllers
- Virtual instruments and plugins
- Sounds and samples
1. A computer for your home music studio
First and foremost, you’ll need a reliable computer for recording instruments and vocals, making beats, designing sounds, and producing music.
Today, digital audio is the heart of music studios and computers are at the forefront of music production. In fact, music production is so widely accessible because you can:
- Download digital music-making software to computers
- Connect digital recording and performance devices to computers
As a result, a computer for music production is the first thing to get for a home music studio. Whether you’re making beats or recording audio, your music production PC is something to go as big as you can on.
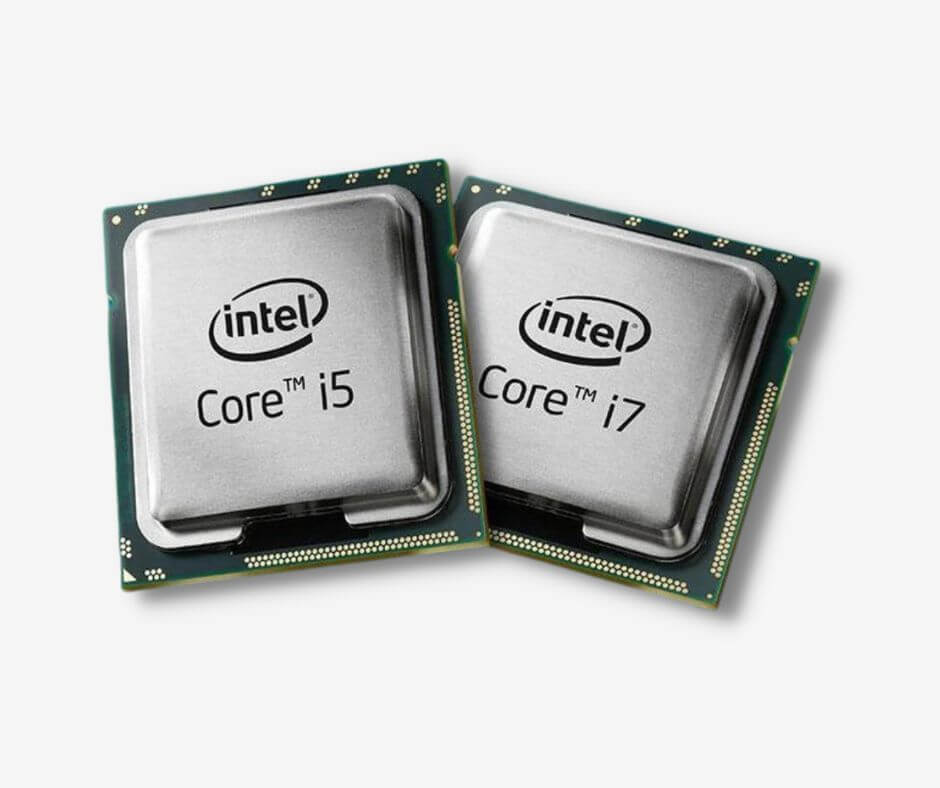
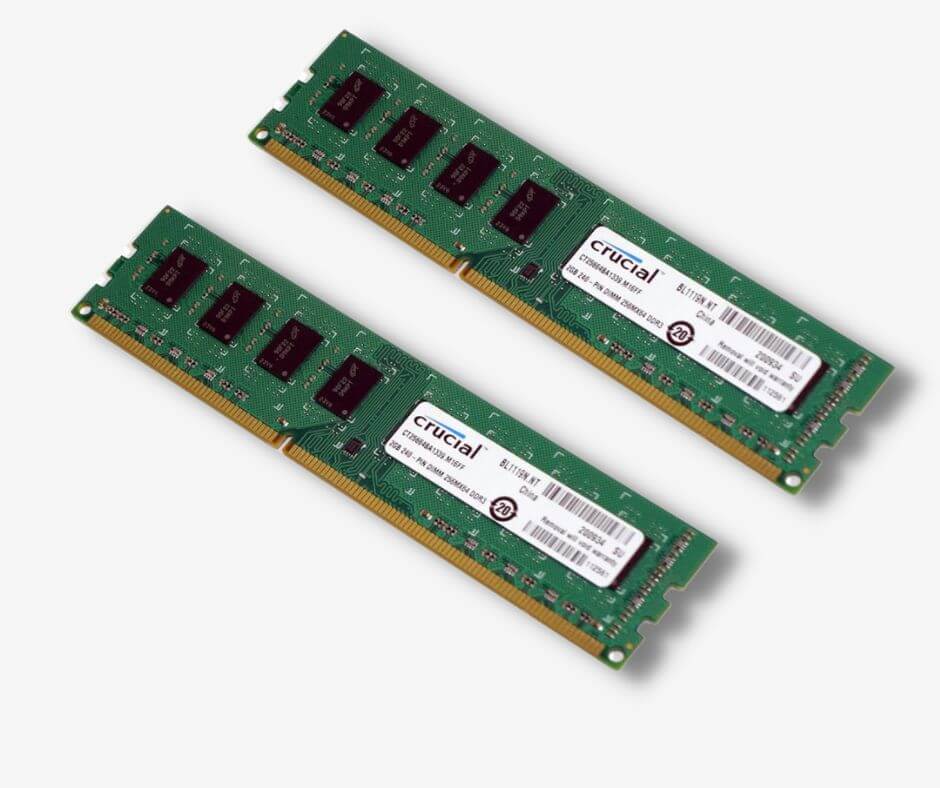
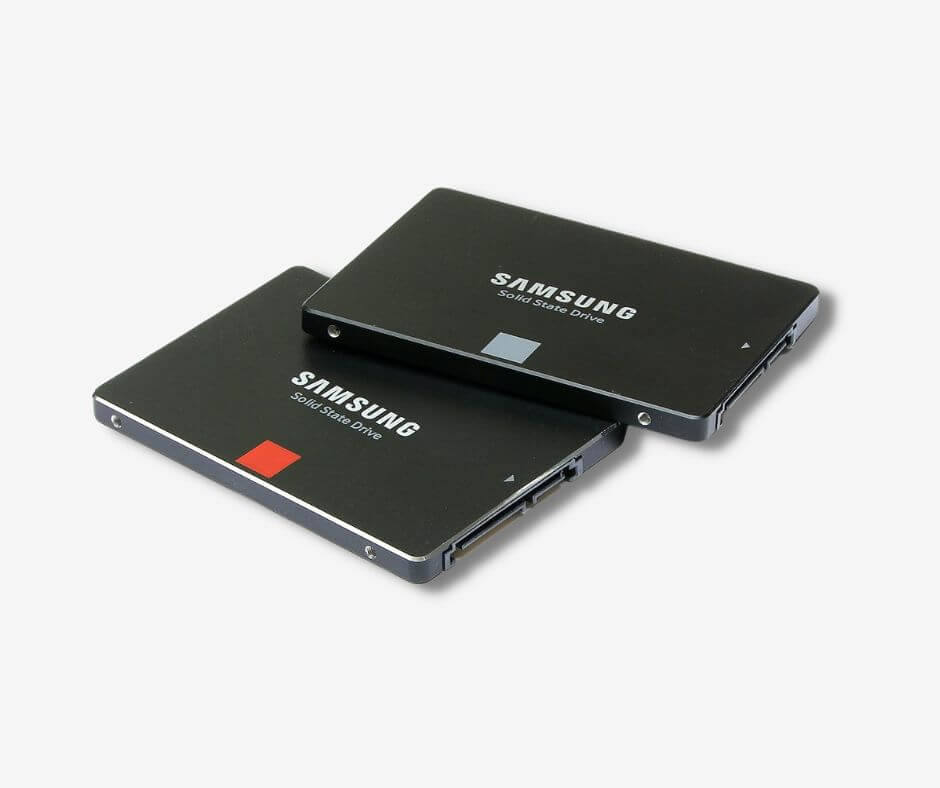
There are three specifications you’ll want to prioritize more than others: CPU, RAM, and SSD storage.
-
Intel CPU
Image Credit: Intel -
RAM
Image Credit: PC Mag -
SSD storage
Image Credit: YouTube
- Quad-core CPU (with a minimum clock speed of 2.4Ghz)
Both the Intel i5 and i7 are quad-core processors with a clock speed high enough for music production.Having a multi-core processor allows your computer to multitask better, and this is essential for processing multiple channels of audio, plugins, and virtual instruments.
- 8GB of RAM
Random Access Memory is the short-term memory that stores information that your processor needs quick access to.While 16GB is more desirable, at least 8GB of RAM allows your computer to handle enough information for a smooth music production experience.
- 500GB SSD Drive
Solid State Drives use flash memory to store information, so they don’t have any moving parts as opposed to Hard Disk Drives. Furthermore, SSDs have faster read and write times than HDDs because they’re digital (not mechanical).
Devices that use Flash memory can access information faster than mechanical storage devices. Therefore, your music production programs open faster and run smoother, giving you a better user experience while recording instruments or making beats.
Finally, having enough SSD storage ensures there’s room for both your audio files and programs to sit on one drive. At least 500GB is a good starting point, but a terabyte will serve you much better long term.
In an ideal world, you’ll want the fastest computer you can afford for music production. No matter if it’s a computer for making beats or recording instruments, your home recording studio depends on the capabilities of your computer.
However, nearly all computers have enough processing power to handle recording in small quantities. So if you have a computer of some sort, see if you can make do for now – your budget will thank you – because you can always upgrade in the future.
What about a laptop for music production?
If you want to make music on the go, you’ll want to look for a laptop with these specifications rather than a desktop PC.
A laptop with a battery life between 4 to 8 hours may see you through on an average day, but it’ll depend on your usage and how many programs you have open.
Here are some affordable laptops for music production.
- ASUS VIVOBOOK 15 – the best laptop for music production under £1000
- Acer Aspire 5 Slim
- HP Jaguar 15.6″
2. DAW software for recording audio, making beats, and arranging music
With your computer setup, you’ll need some music-making computer programs. The first of any music-making software you’ll need is a Digital Audio Workstation.
DAW software allows you to record and edit audio, apply effects to instruments or groups of them, and mix the audio channels to work together as a song.
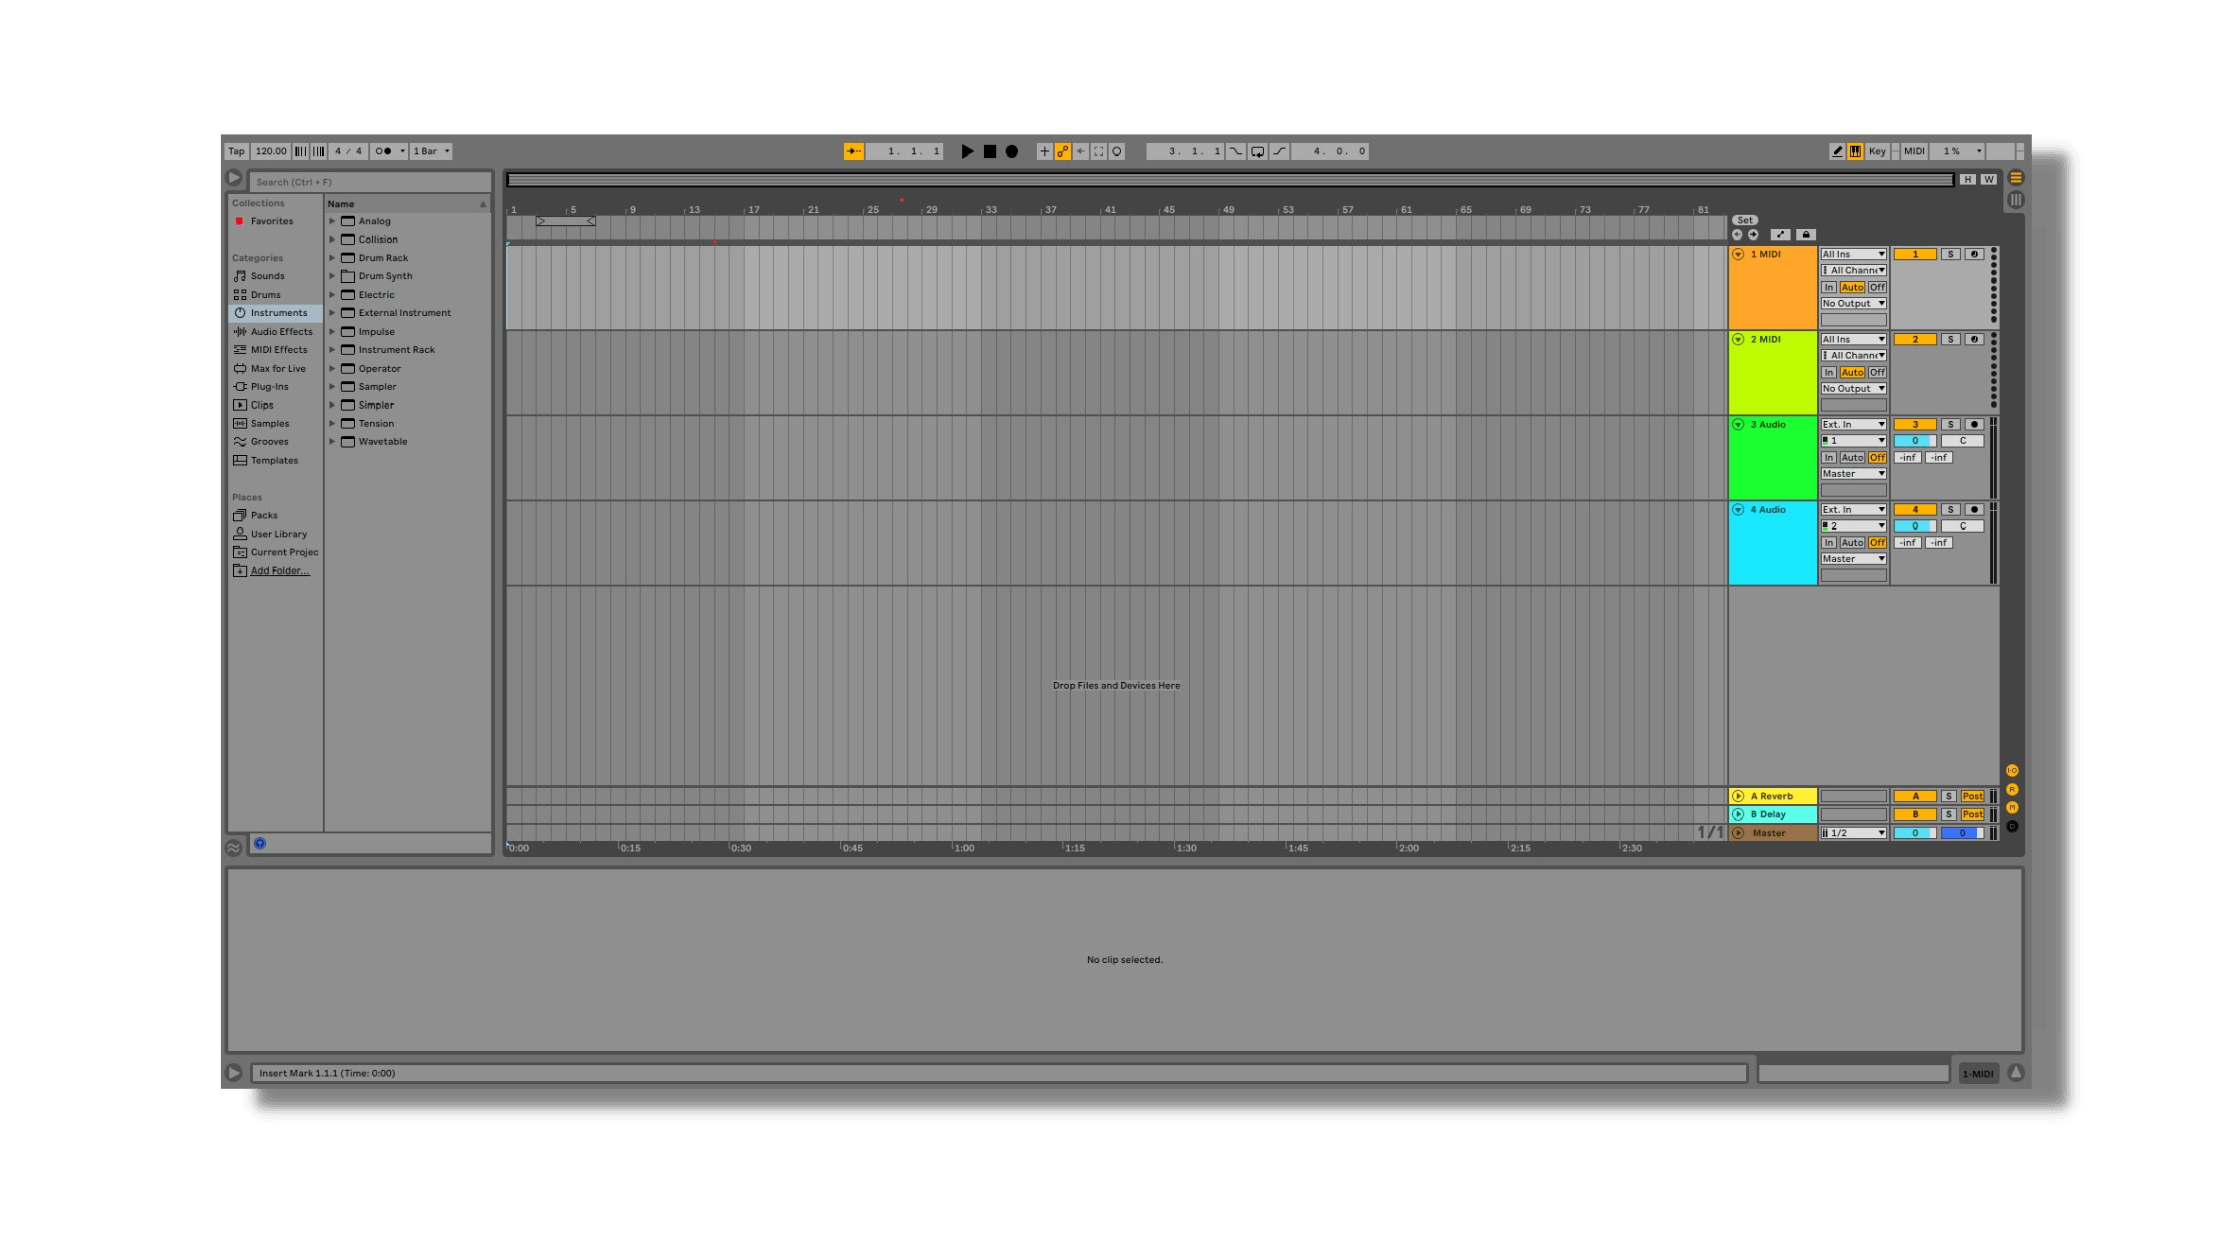
Image Credit: Ableton
In summary, a digital audio workstation is a music-making software for PC and Mac where you can record, edit, and organize your musical ideas.
You can compose music via MIDI in a DAW or record audio into them with a microphone. Then, you can expand your ideas into full songs, mix, and master them.
Below is a list of some industry favorites DAWs
Each DAW offers a unique workflow based on different user needs and musical styles. Some are better for recording instruments (Logic Pro, Pro Tools, Cubase), others are better for making electronic music (FL Studio, Ableton, Bitwig), and others are good for both.
DAWs allow you to work quickly and experiment seamlessly. Some DAWs like Ableton and Logic Pro X are renowned for their user-friendly interfaces too.
But these DAWs are a little on the expensive side. However, there are free DAWs that will provide you with every tool you’ll need to get started recording music and producing.
Below are some examples of free DAWs that are great for beginners:
3. An audio interface for recording music at home
You’ll need an audio interface to record anything professionally. They allow us to record microphones and electric instruments, as well as connect headphones and speakers to our setup.
In short, it’s audio interfaces that make professional home recordings so accessible today.
They’re critical tools if you want to record audio to a professional standard. Unless you make all of your music “in-the-box” (using only computer programs), you’ll need an audio interface to record music.
Computer motherboards or soundcards don’t accept microphone XLR cables, but audio interfaces do. Therefore, only audio interfaces can accept these inputs and then convert the microphone signals into digital signals that your computer can read.
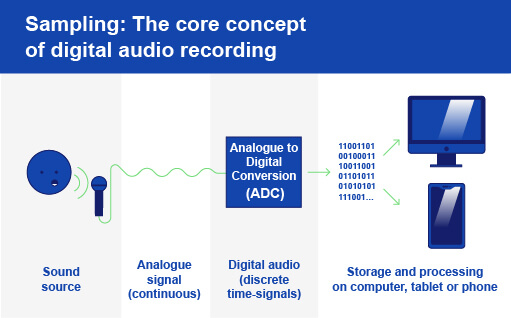
Furthermore, an interface generally provides more connectivity options than computer motherboards do. You can connect multiple microphones, multiple electric instruments, and more!
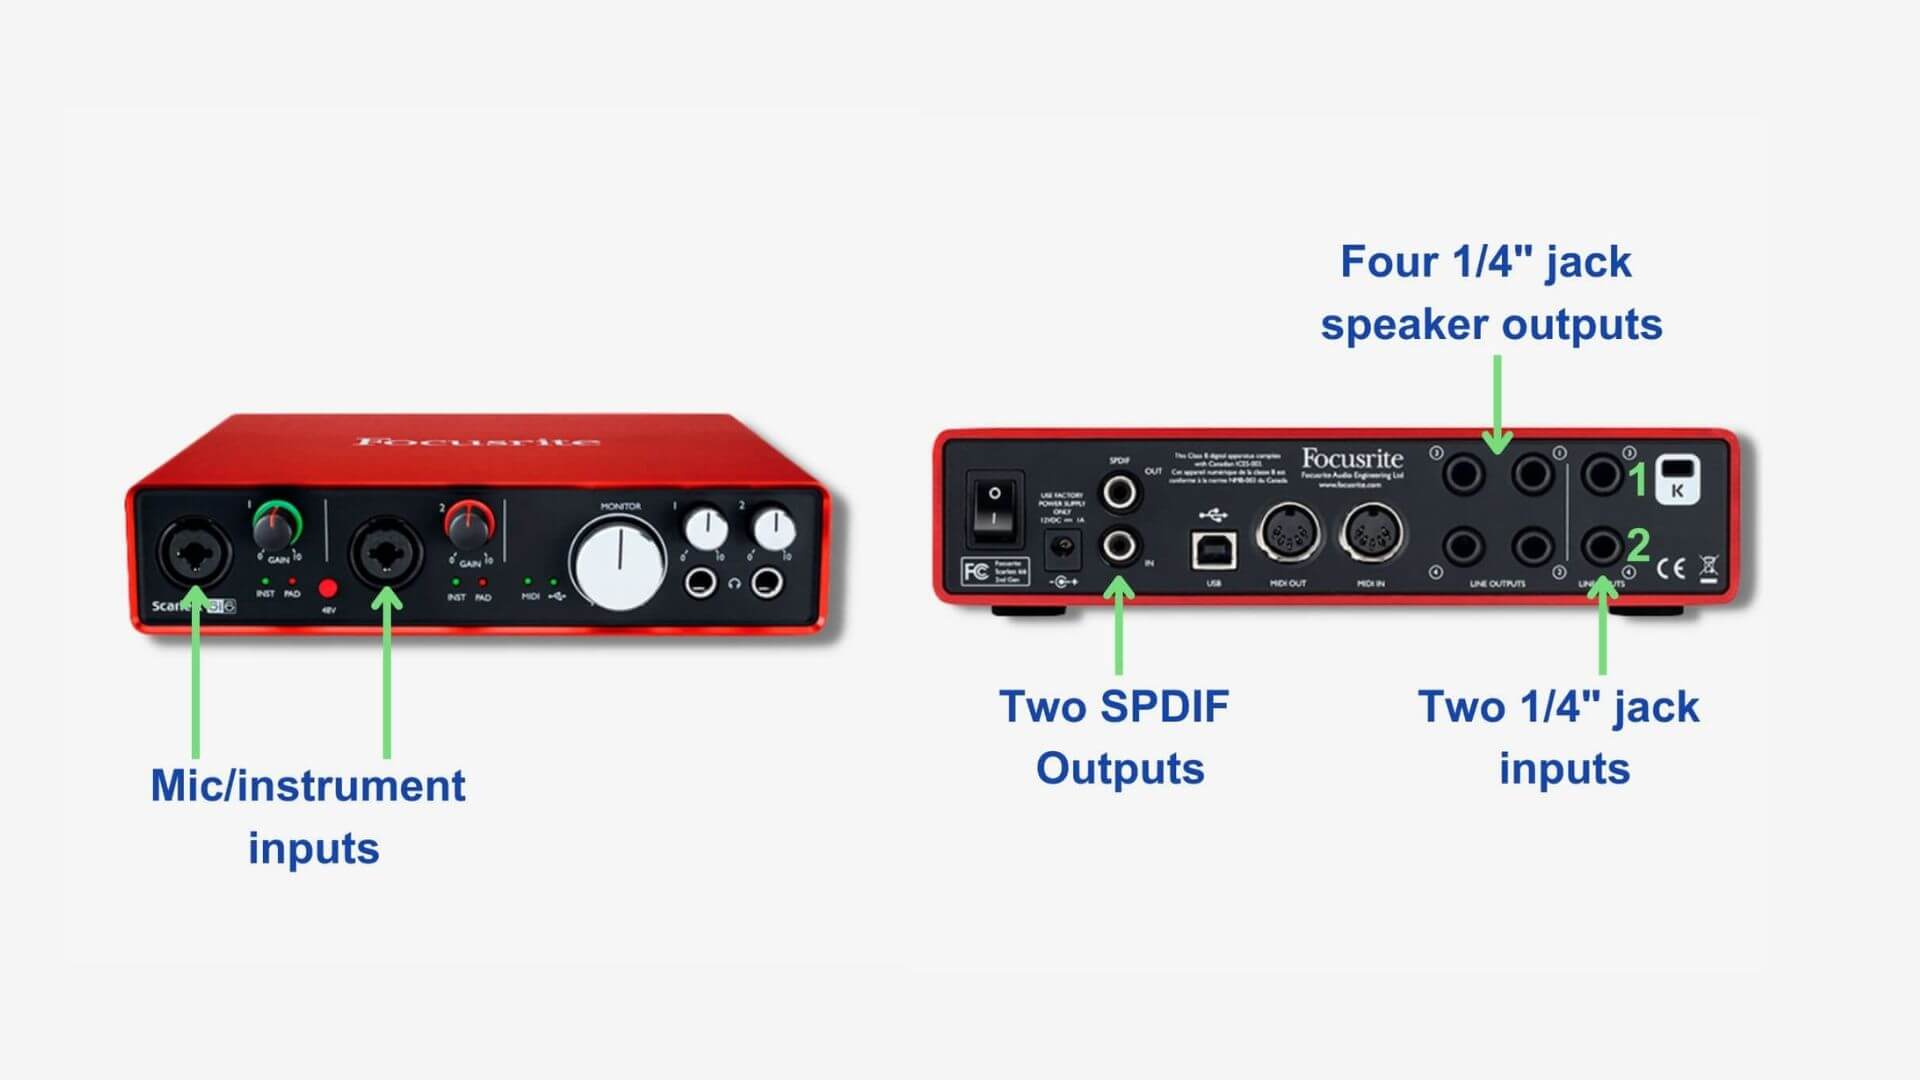
Below is a list of 3 entry-level audio interfaces:
Do you need a DI Box for recording?
Many people ask if a DI Box (Direct Injection/Direct Input) is necessary for a home studio. The answer is: you could use a DI box but you don’t need one if you have an audio interface.
This is because audio interfaces utilize microphone preamps and dedicated instrument inputs. In short, an audio interface will give you all the inputs you need in your home studio.
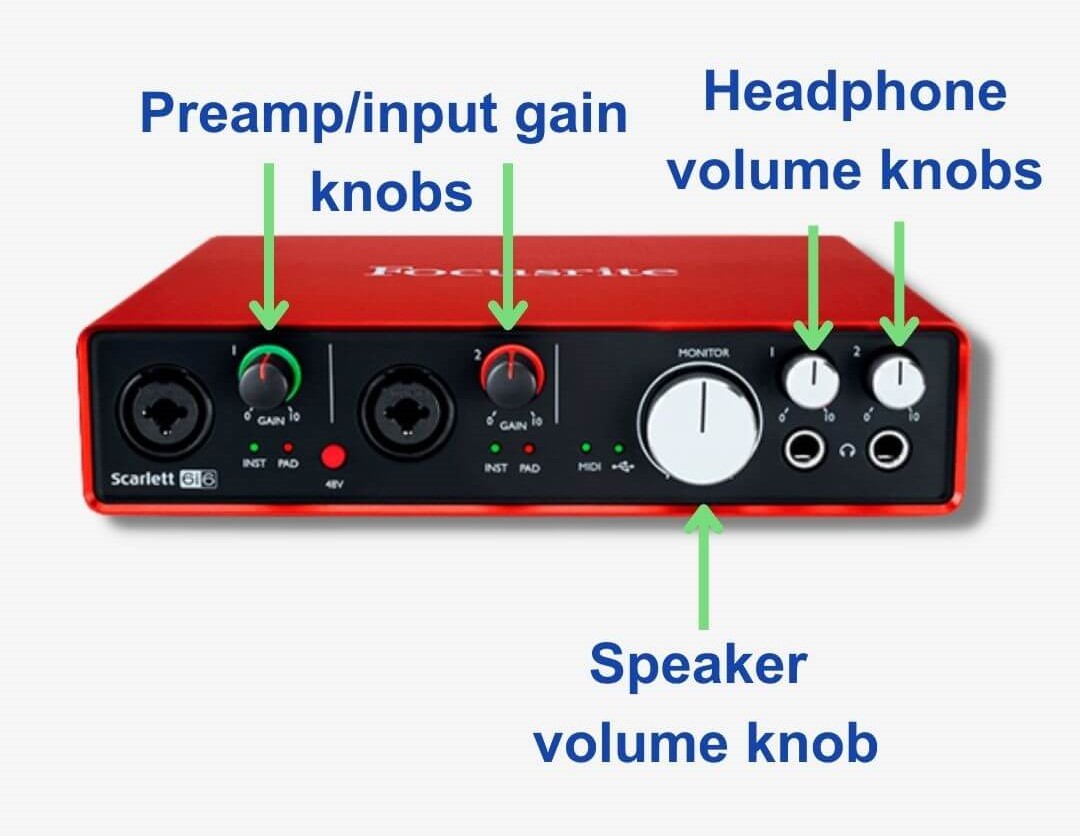
You don’t need a DI Box unless you are connecting bits of equipment with mismatching voltages together.
4. One or two microphones for recording anything
If you’ll be recording acoustic instruments, you’ll only need one or two home recording microphones. And the instruments you want to record should dictate the microphone you buy.
A microphone registers the soundwaves of your performance and converts them into electrical signals. Then, it sends this signal to an audio interface input which then converts the signal to a digital one.
The two types of microphones you’ll want to consider are dynamic and condenser microphones.
Dynamic microphones are more durable but have less sensitivity than condenser microphones. This makes them better suited to recording louder sound sources like drums and guitar cabinets. They’re often cheaper, but their design makes them better for live sound too.
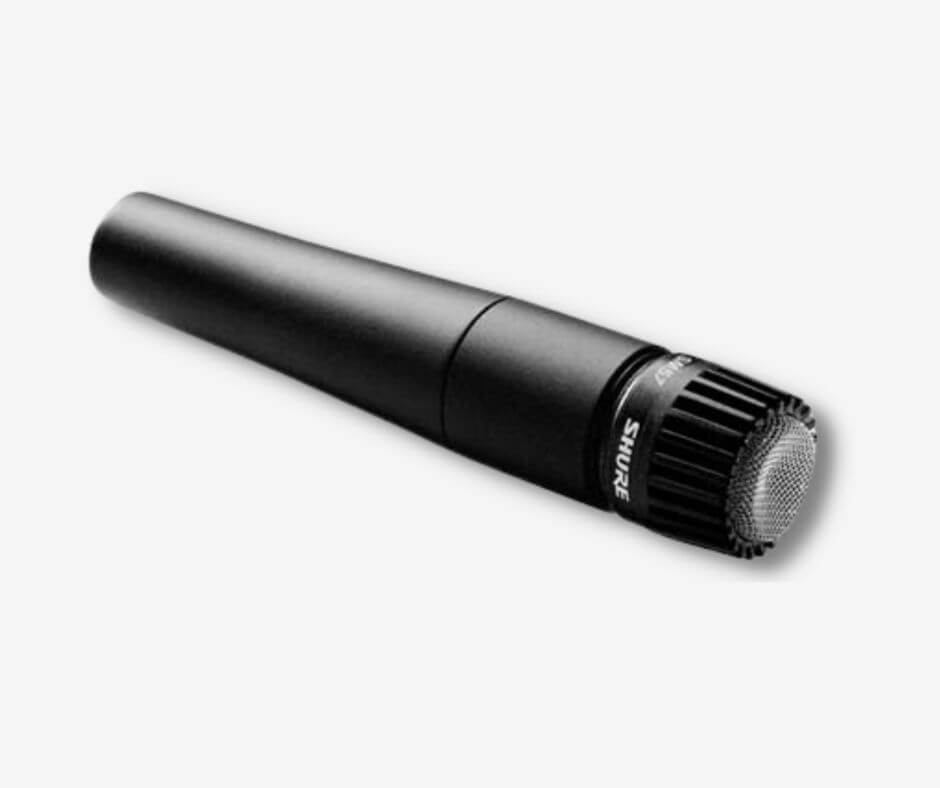
Image Credit: Shure
On the other hand, condenser microphones have a lot of electrical resistance. So, they need phantom power to reduce the resistance and increase the sensitivity of the microphone.
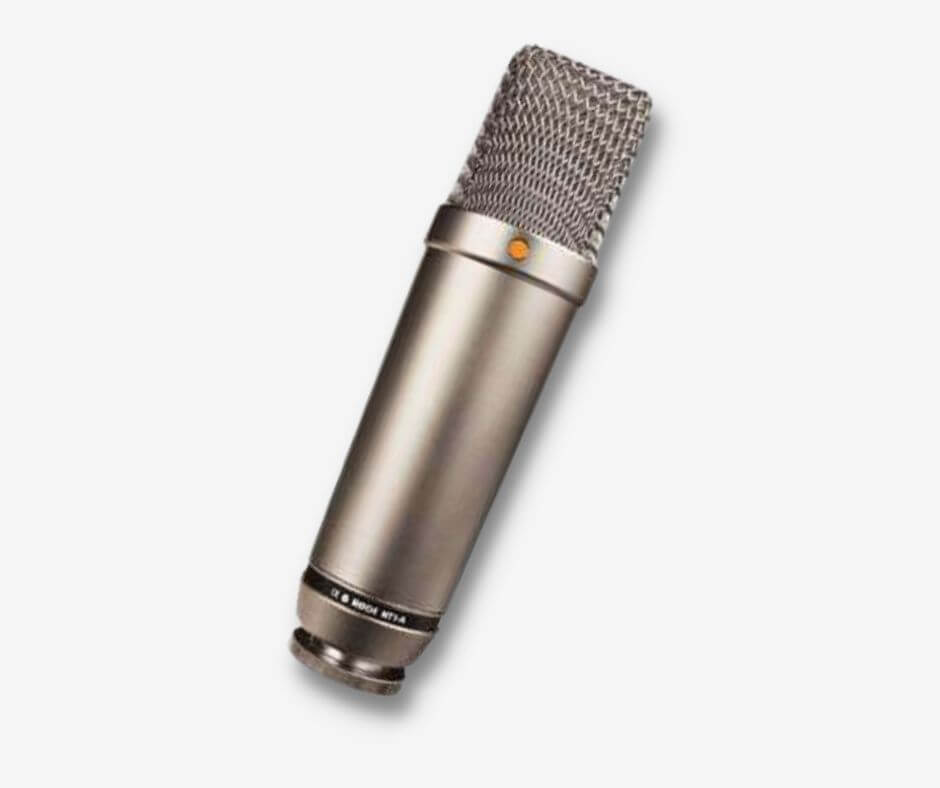
Image Credit: Rode
The boost in current allows condenser microphones to capture intricate sonic details of a soundwave, making them better for quiet instruments like acoustic guitars and vocals.
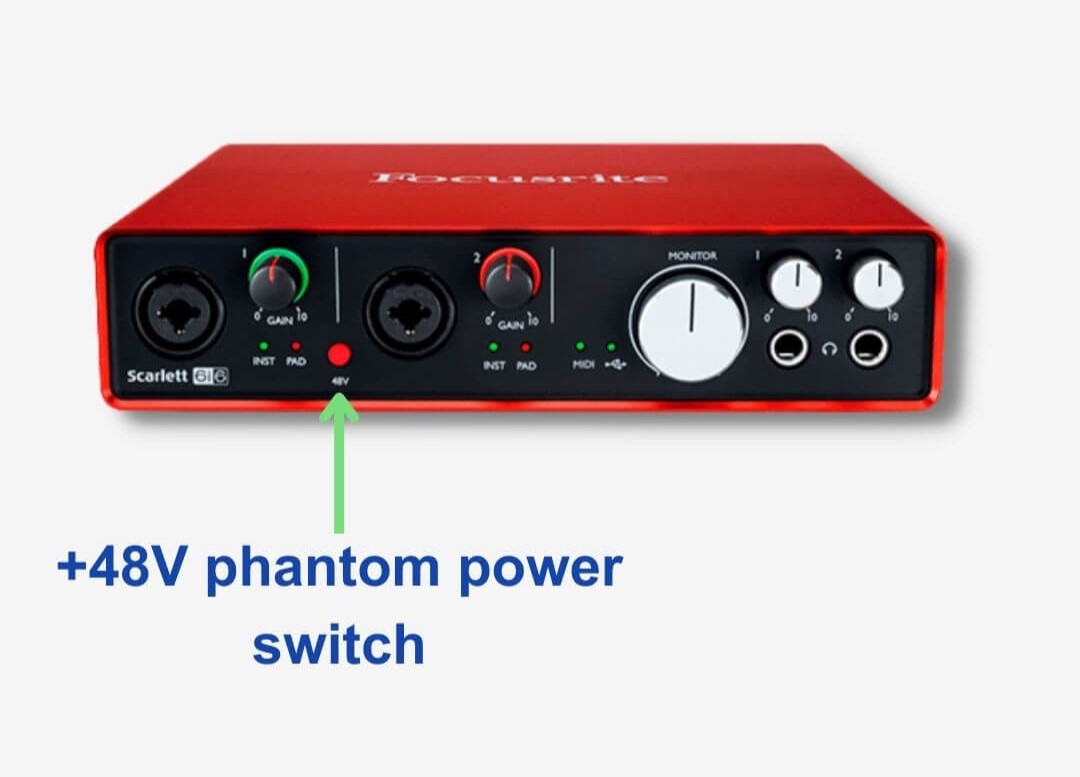
You’ll be collecting microphones as if they were stamps as time goes on, but each microphone will serve you a different purpose.
Below is a list of microphones that’ll let you get started recording a variety of instruments.
- Rode NT1-A (Large-diapram condenser)
NT1-A is the perfect choice for recording vocals and acoustic instruments that are rich in high-frequency detail.
- AKG D112 or Shure Beta 52A (Dynamic)
The D112 or Beta 52A are great microphones for recording loud sound sources like a bass cabinet or a kick drum.
- Shure SM57 (Dynamic)
Finally, the SM57 is the most notorious microphone for handling loud sound sources such as snare and tom drums, in addition to guitar cabinets.
Recording in the right environment
In addition to the right microphone, you need to record in the right space. It’s often tricky converting a room at home into an acoustically sound home studio when you have limited money.
Sound naturally travels in every direction and will bounce around the room if the room isn’t treated. Unfortunately, microphones register that reflected sound which means the room you’re recording in has a huge impact on your recording.
Check out the video below to find out how you can begin treating your home studio.
Microphone stand
In short, a microphone stand is a mount for your microphone. There are six different designs of microphone stands, each allowing you to freely position your microphone.
Not all microphone stands are the same and finding the right microphone stand for you is one of the most valuable buys.
Of course, the immediate benefit is that you don’t have to hold the microphone. But another, and perhaps the bigger benefit, is that it removes the risk of the mic registering static interference that it would if you were holding the microphone.
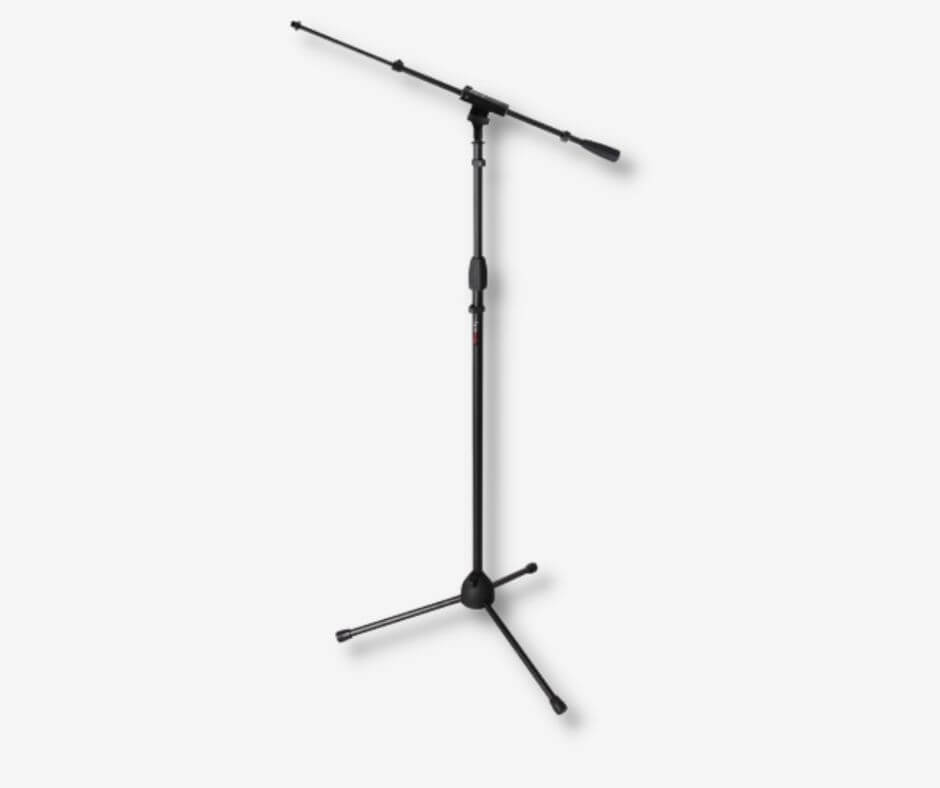
Types of microphone stands
- Tripod stands are the most common microphone stand. They’re designed for general use, and they’re commonly used to capture guitar cabinets. You can identify them via their three tripod-style feet.
- Tripod boom stands have a longer reach than tripod stands but maintain the three tripod style feet.
- Round base stands have a round base rather than feet. This design takes up less floor space which makes them great for capturing vocals as they’re harder to trip over.
- Low profile stands are smaller in size. As a result, we can use them to capture kick drums and even guitar cabinets.
- Desktop stands look like low-profile stands due to their smaller size but can have tripod feet or a round base. They’re great for podcasting and bedroom recording!
- Overhead stands are the tallest – and most expensive – microphone stands. We’d use them when we need to reach big heights and awkward angles like drum overheads.
Moreover, a shock mount houses your microphone at the top of the stand too. Though different microphone shapes ask for different shock mounts, the sensitivity of a microphone plays a huge factor in how absorbant the shock mount needs to be.
Here is a couple of affordable tripod microphone stands:
A mic pop filter
What does a microphone pop filter do? Well, the purpose of a mic pop filter is to cancel out low-frequency blasts of air (pops/plosives) that naturally occur with words that include B’s and P’s.
These pops are undesirable because they’re heard as thuds in recordings. Together, a microphone, a pop filter, and a microphone stand give you the ultimate home recording setup.
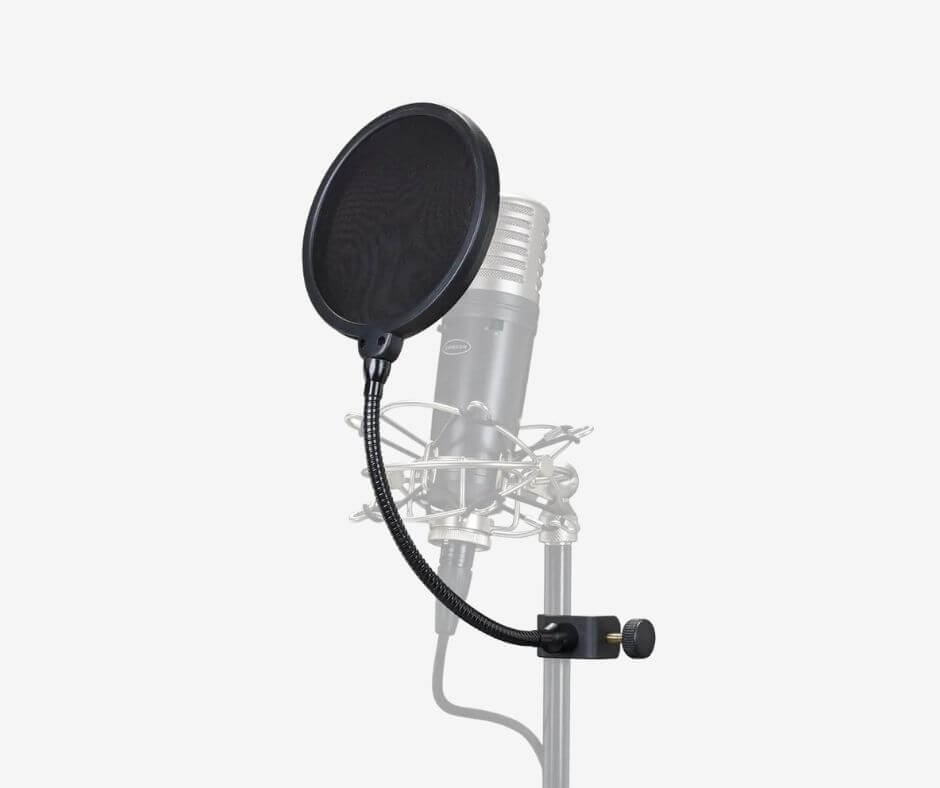
Pop filters also protect your microphone from saliva. So if you’re planning on recording vocals you’ll want a pop filter.
5. Music production headphones and speakers
You’ll need studio headphones or speakers to hear the details of your music that laptop speakers and small desktop speakers won’t be able to reproduce… but you don’t need both.
The chances are that your room is cluttered, maybe cramped, and generally small. These conditions make for a poor acoustic space and placing studio monitors in this space is a wasted effort.
But headphones aren’t prone to the same vulnerabilities, so focus on getting studio headphones if you can’t afford acoustic treatment or your room is how I have described.
Studio headphones for monitoring and mixing
There are three types of studio headphones. These are closed-back, open-back, and semi-open-back.
Closed-back headphones
Closed-back headphones are an essential bit of studio equipment while recording instruments. The earcups on closed-back headphones are sealed, which is why we call them so.
This design prevents sound from leaking into your outside environment and into your microphone. This makes them perfect for monitoring while recording as closed-back monitoring headphones don’t bleed sound into the microphone.
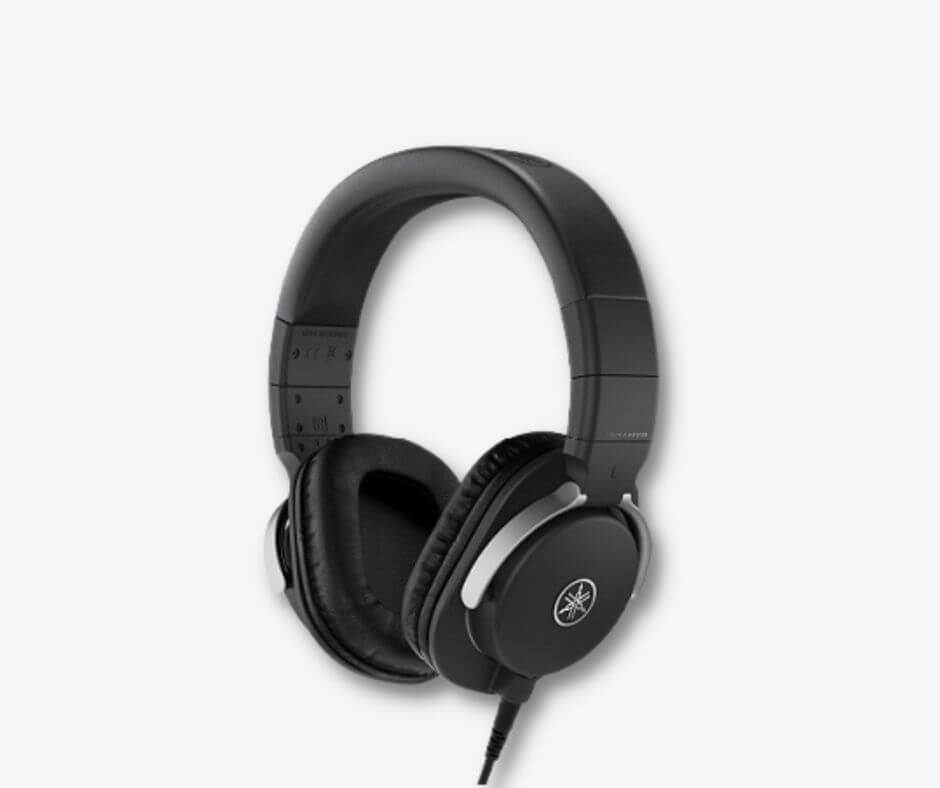
Image Credit: Yamaha
With that said, the sealed nature of these headphones means that sound reflects in the earcup, leaving something to be desired while mixing.
Open-back headphones
The purpose of studio headphones for mixing is to allow you to hear the details of your music. But closed-back headphones aren’t the best for this due to the reflected sound in the earcup.
In contrast, the design of open-back headphones deliberately leaks sound. The earcup is open whereby a thin metal grill with air holes allows sound pressure to leave the earcup.
No sound reflects within the earcup as a result.
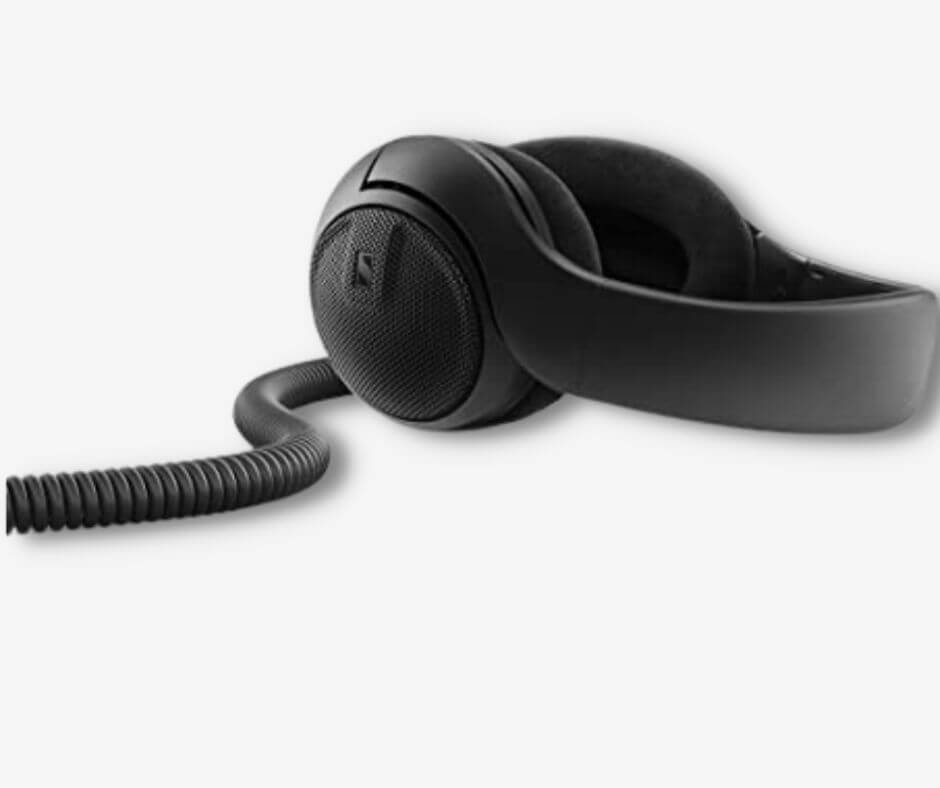
Image Credit: Sennhesier
In other words, open-back headphones have more of a ‘natural” sound because they release sound pressure into your outside environment. But open-back headphones are also more expensive than closed-back cans.
The stereo-field reproduction and bass response of open-back headphones are more accurate due to their design, so you can hear a more accurate reproduction of your mix.
In short:
- Closed-back headphones for recording
- Open-back headphones for mixing and mastering
Semi-open back
Finally, semi-open-back headphones are the best of both!
They’re partially open at the back of the earcup but more or less closed. But they do allow air to out of the earcup because they don’t seal the rear of the cup entirely.
While more suited to mixing, semi-open-back headphones leak sound to a much less extent than open-back headphones. This means you can use them for monitoring while recording, but closed-back headphones are still the best option here.
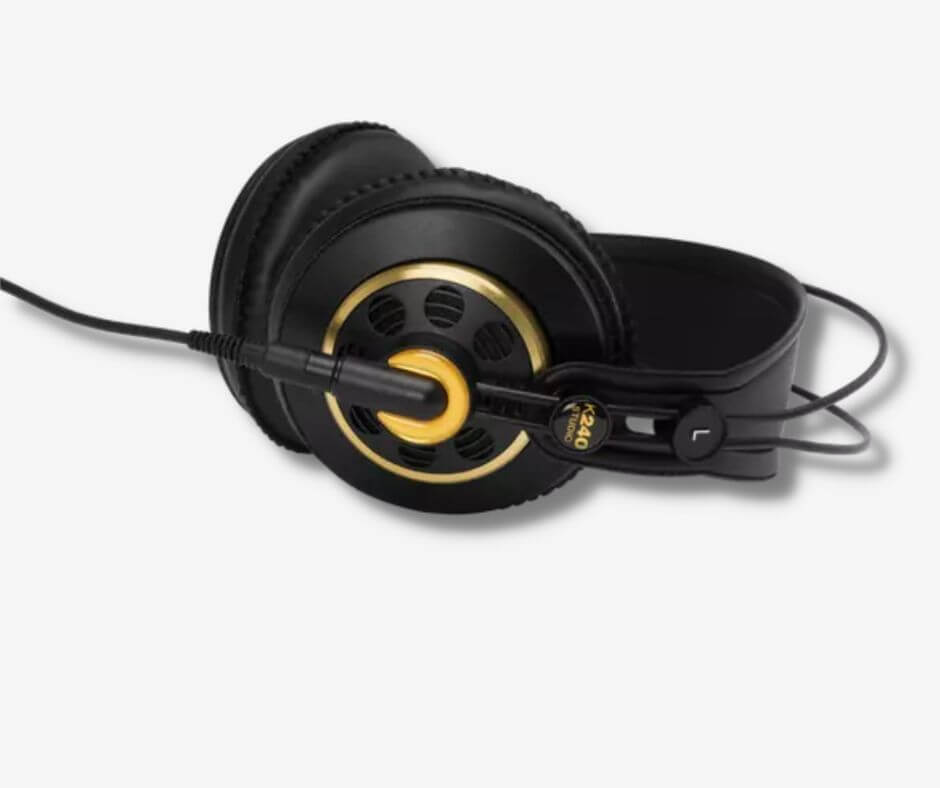
Image Credit: Amazon
But semi-open-back headphones will make a great first pair of studio headphones, especially if you have a small budget. As a merger of the two, you can use semi-open back cans for both mixing and monitoring with their extended low-frequency response, a strong stereo field, and some sound isolation.
Below is a list of good music production headphones for beginners:
- Sony MDR-7506 (closed-back) – best budget headphones for music production
- Audio Technica ATH-M30x (closed-back)
- Yamaha HPH-MT5 (closed-back)
- Sennheiser HD 400 Pro (open-back)
Are Beats by Dre good headphones for making music?
Commercial headphones like Beast by Dre, Apple AirPods, and the rest are not ideal for making music. Commercial headphones utilize frequency boosts (particularly in the low end) to improve the listening experience for users.
The frequency boosts will distort your perception of your music productions, while headphones with as flat a frequency response as possible will sound more true to what you’ve made.
Consequently, recording & producing music with commercial headphones like Beats by Dre removes opportunities for informed decision-making.
In contrast, the goal of music production headphones and studio monitor manufacturers is to create speakers with ‘flat’ frequency responses. In other words, headphones for producing music utilize as few frequency boosts and cuts as possible.
Studio monitors (speakers for music studios)
Like studio headphones, comparing studio monitors to consumer-grade speakers shows us that studio monitors have a flatter frequency response. Consequently, they provide a more neutral and transparent reproduction of your music.
They do so because they’re active speakers which means they have an internal amplifier. In contrast, most consumer audio systems like home entertainment setups are passive because they rely on an external amplifier to boost the audio signal.
Compared to headphones, the frequency response of studio monitors is generally more accurate thanks to the bigger drivers too.
Though studio monitors are speakers for producing music, they’re not essential for your home studio at first.
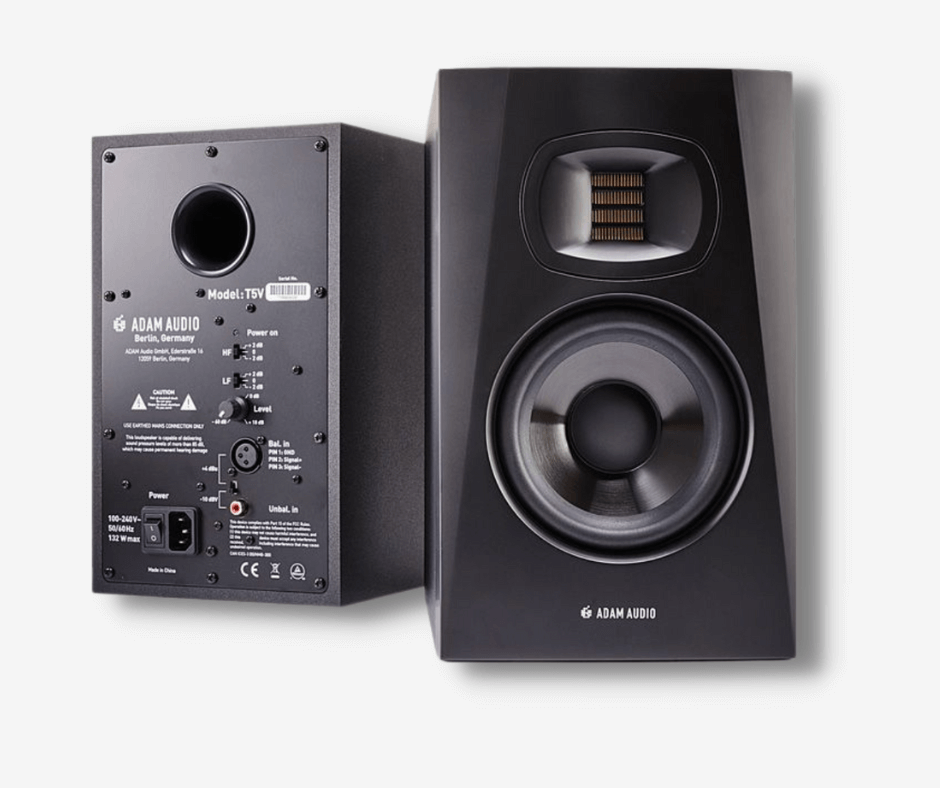
Image Credit: Adam Audio
If the space that will host your music is a small room, is cluttered (as bedrooms can be), or has parallel walls then it’ll be a poor acoustic space. As a result, studio monitors (otherwise known as nearfield monitors) won’t sound as good as they could.
But let’s say you have a good acoustic space and carry on because we both know you’re going to buy a pair someday…
Speakers for music production
Studio monitors are a great tool for mixing when they’re in acoustically sound spaces.
Many studio monitors also come with adjustable EQ settings and Room Correction. Some speakers offer more settings than others, but these tools allow you to tune your monitors to your room.
But EQ and Room Correction tools can only do so much. While they can make speakers sound great in good acoustic spaces and can help speakers sound better in bad spaces, defeating uncontrolled acoustics in your space is very hard for any pair of speakers.
What’s on the back?
Unfortunately, the EQ settings on entry-level studio monitors are often minuscule. Though most speakers at this level offer some settings they don’t provide a lot of flexibility.
Let’s take a look at the features on the rear of M-Audio’s BX5 D3 studio monitors.
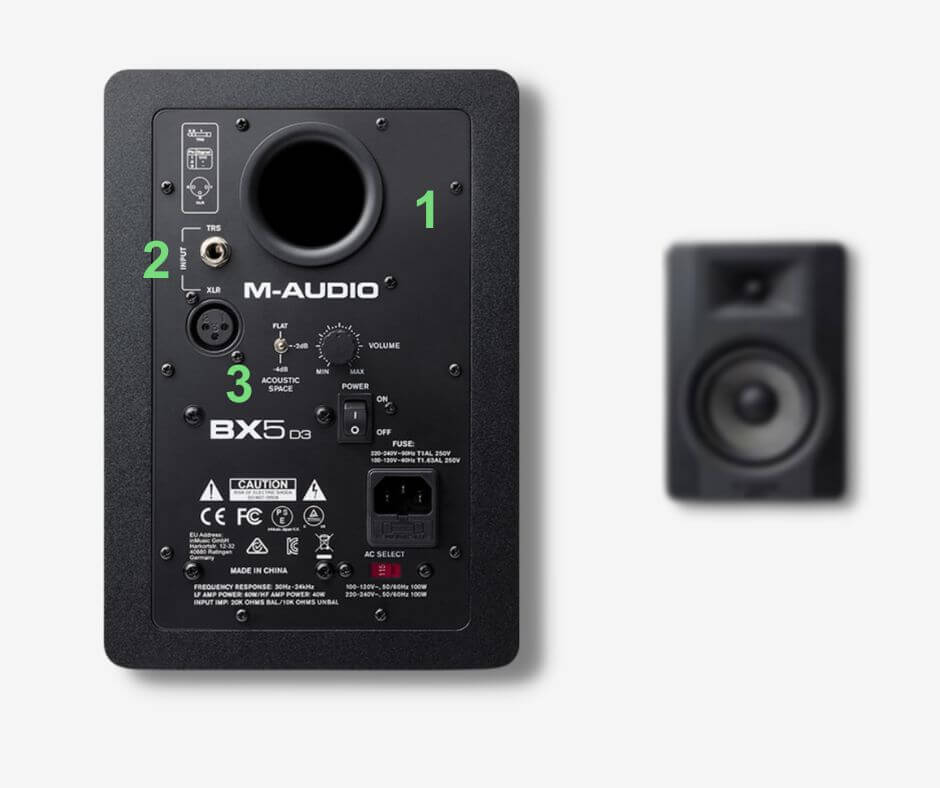
Image Credit: M-Audio
- Rear bass port
Bass ports release low-end energy from inside the speaker to increase its bass response. You can find speakers with bass ports on the front or rear, and they make a significant difference to the bass response either way. - Inputs
The BX5s offer both an XLR and 1/4″ jack for TRS or TS cables.
- EQ & volume control
The EQ controls are minimal on the BX5s. They allow you to increase the output of higher frequencies by 4dB, decrease them by 3dB, or leave them flat.Other studio monitors allow you to adjust the settings for high and low-frequency bands, and some have even more options too.
Music production speakers for beginners
- M-Audio BX5 D3 – the best affordable studio monitors for home recording
- KRK Classic 5 – the best studio monitors for electronic music production
- Mackie CR4-X – most affordable studio monitor speakers
Isolation pads
Whether your speakers will sit on your desk or speaker stands, a pair of isolation pads will go a long way!
Isolation pads prevent the speaker vibrations from vibrating through your desk/speaker stand, thereby isolating the sound that’s leaving the speakers.
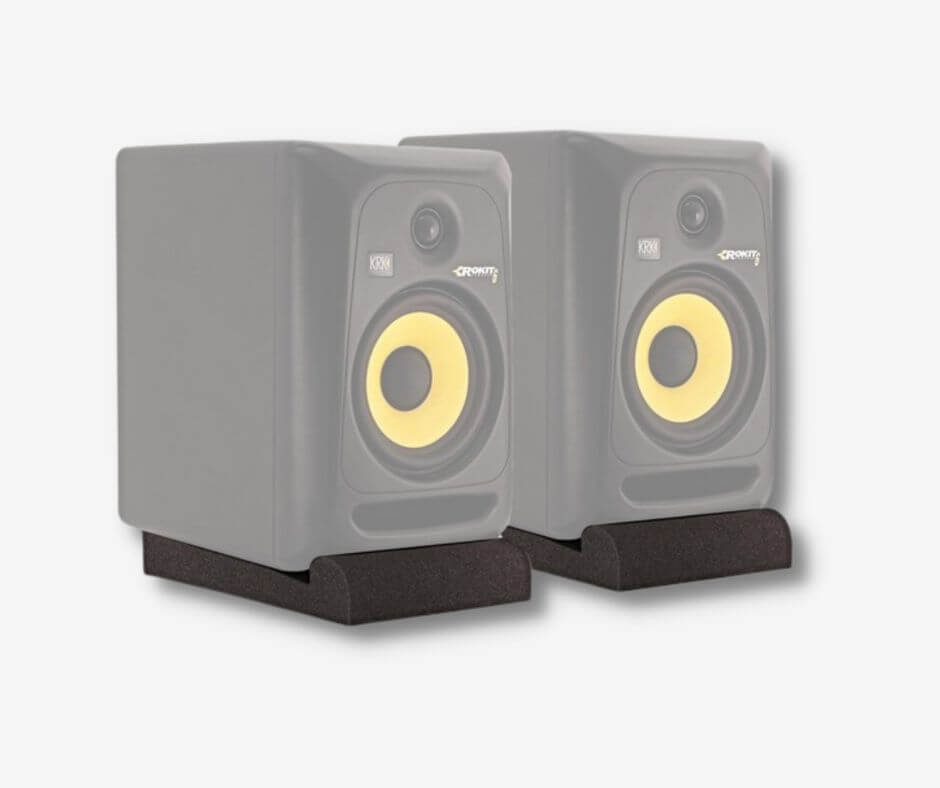
The studio monitors you’ve probably ordered by now may come with stock isolation pads. These may do the trick, but if not you can check out a range of isolation pads here.
6. Cables, cables, cables
There are a number of cables you’ll come across in your journey of making music.
The two main types of cables you’ll use are XLR cables primarily for microphones (but studio monitors also accept them), and 1/4″ TRS / TS for speakers and electric instruments.
- XLR = microphone & studio monitor connectivity
- TRS = studio monitor and headphone connectivity
- TS = electric instruments
Firstly, here is an XLR cable that you’ll use for microphone inputs more than anything.
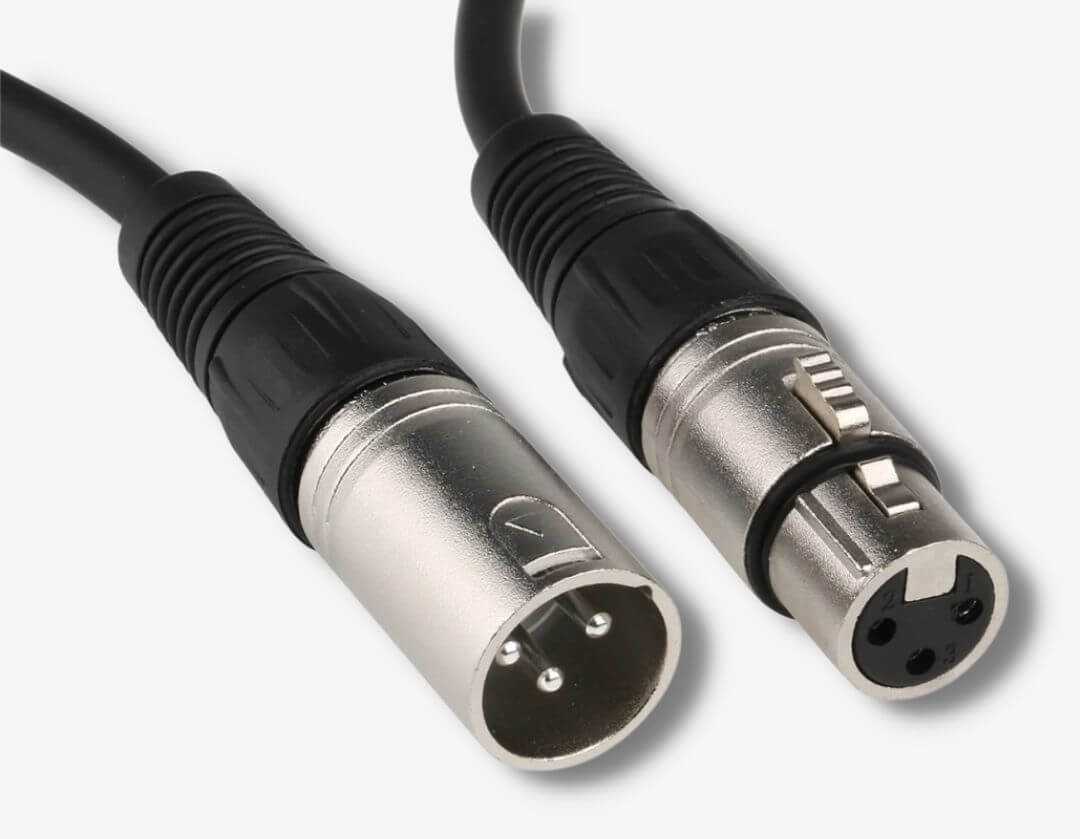
And here are examples of TRS & TS jacks that electric instruments and speakers accept. The difference between them is the additional ring on TRS jacks.
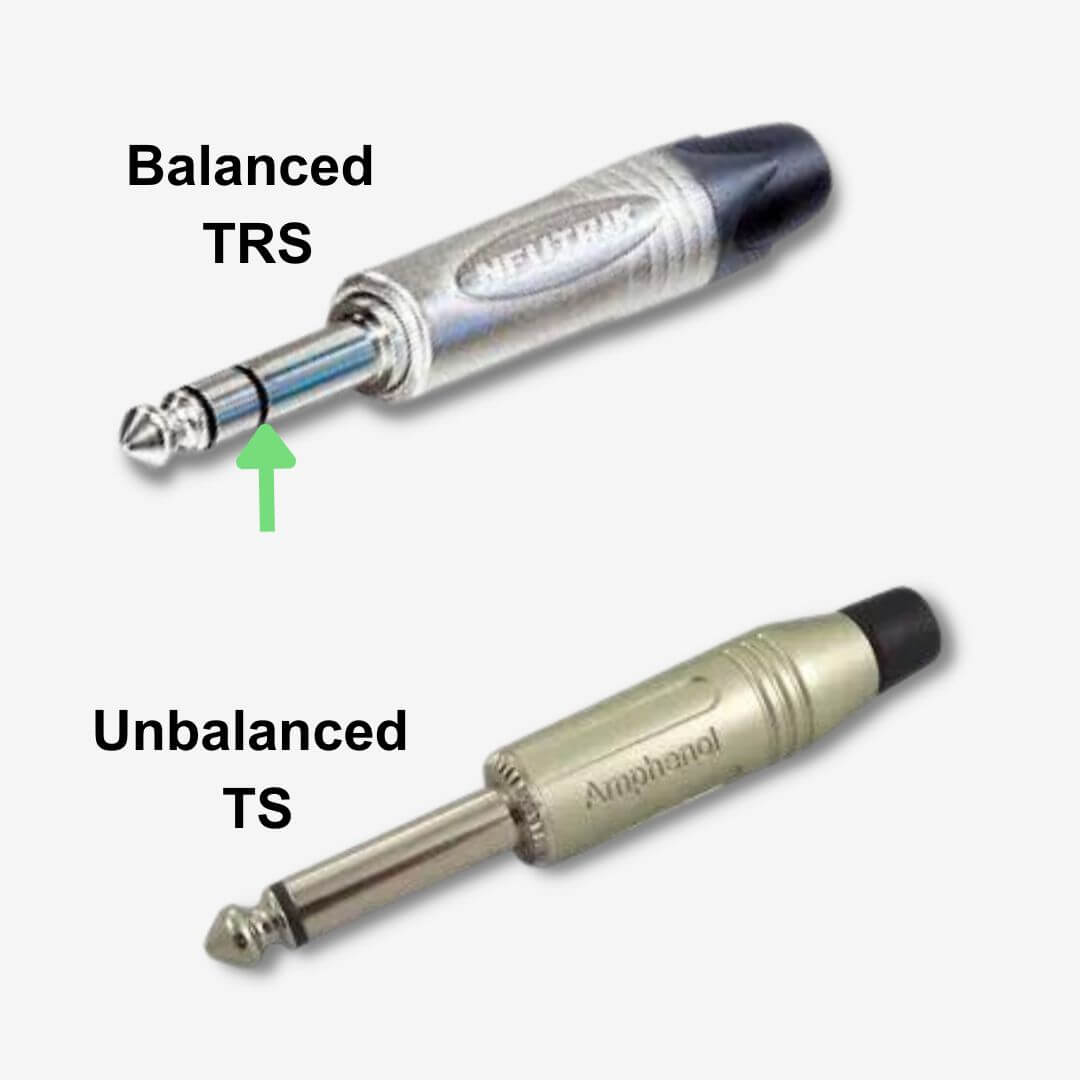
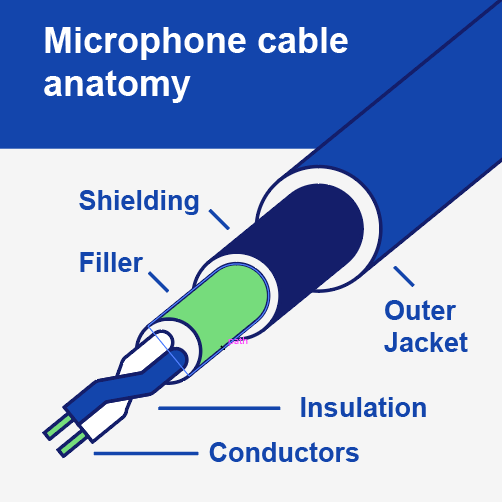
Additionally, XLR & TRS are balanced cables while TS cables are unbalanced. Balanced cables are more desirable for microphone and speaker connections as they eliminate unwanted noise that builds up in the signal while unbalanced cables do not.
Balanced XLR & TRS cables do so by utilizing two wires that carry the audio signal while unbalanced cables use only one signal wire.
The two signal wires in balanced cables carry identical copies of the audio signal with their polarities flipped, then merge the two signals to remove any unwanted noise.
Unfortunately, the one signal wire in unbalanced cables doesn’t eliminate any unwanted noise buildup.
XLR cables
TRS cables
TS cables
7. Acoustic treatment
Some sort of acoustic treatment is essential in a home studio for reasons we’ve explored in our speaker and microphone sections. Acoustically treating your studio helps mitigate the problems that the acoustics of the space will cause you.
Rectangular rooms (not square rooms) with tall ceilings, no parallel walls, hard flooring (with a rug), and internal structures that disrupt reflected sound are rooms with good acoustics qualities.
Building a room with naturally good acoustics asks for a lot of money and time. But this isn’t feasible for so many people, and most of us have a perfectly square room with four parallel walls where reflected sound thrives.
Though you can dampen these reflections with fabricated wall hangings and tapestries, well-placed acoustic treatment minimizes the amount of reflected sound that can cause you trouble.
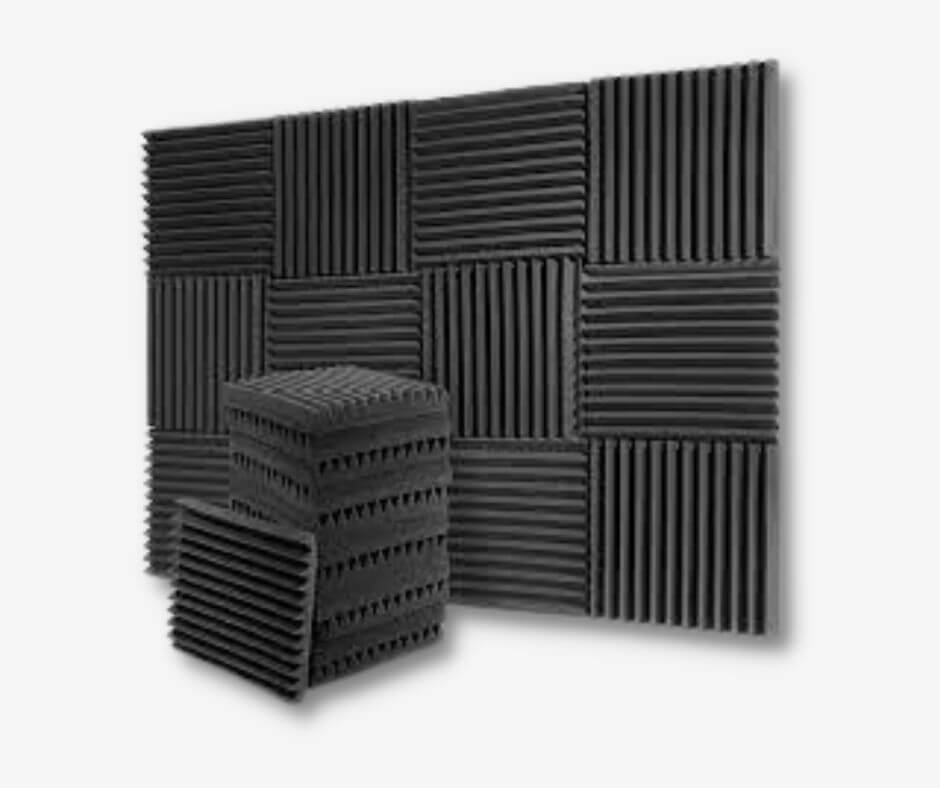
You’ll need a combination of three things to get the best acoustics, but you don’t need all three to get good results.
- Bass Traps
- Absorption Panels
- Diffusers
Measure your room before you start throwing cash at the problem. Then use this guide below to make an informed choice about how much treatment your home studio needs.

8. MIDI controllers
Now it’s time to talk about the digital hardware that makes music production on computers more immersive, fun, and creative.
A MIDI controller (Musical Instrument Digital Instrument) is a physical interface between you & your music production software. A MIDI controller sends digital data to your computer that it and other digital music hardware can read and process.
In practice, a sound source could be a virtual instrument or a sample, and you can use the MIDI controller to trigger the sound. Many MIDI controllers feature controls that allow you to manipulate the virtual instruments’ settings too!
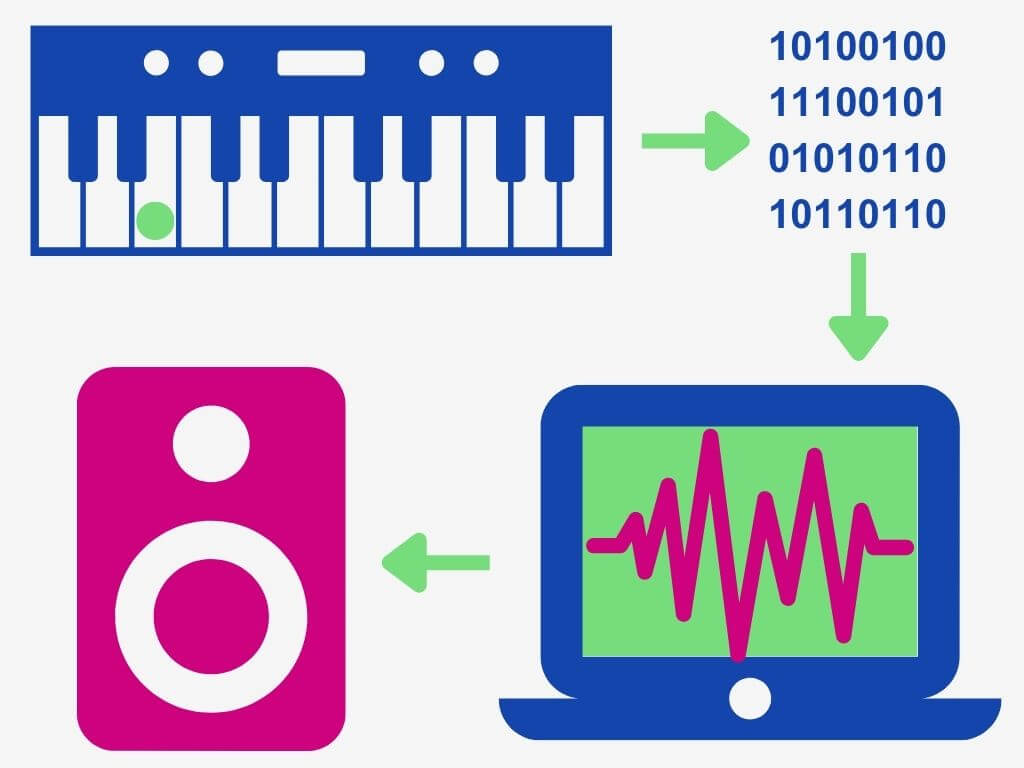
Therefore, you can use MIDI controllers to:
- Play notes and program drums with virtual instruments
- Control the settings of DAWs, virtual instruments, and plugins
Though they’re not essential in a home studio, they’re both handy and fun to have because they make composing music more interactive (especially if you’re making electronic music or beats).
The three main types of MIDI controllers are:
- Keyboards
- Touchpads
- Control surfaces
Keyboards
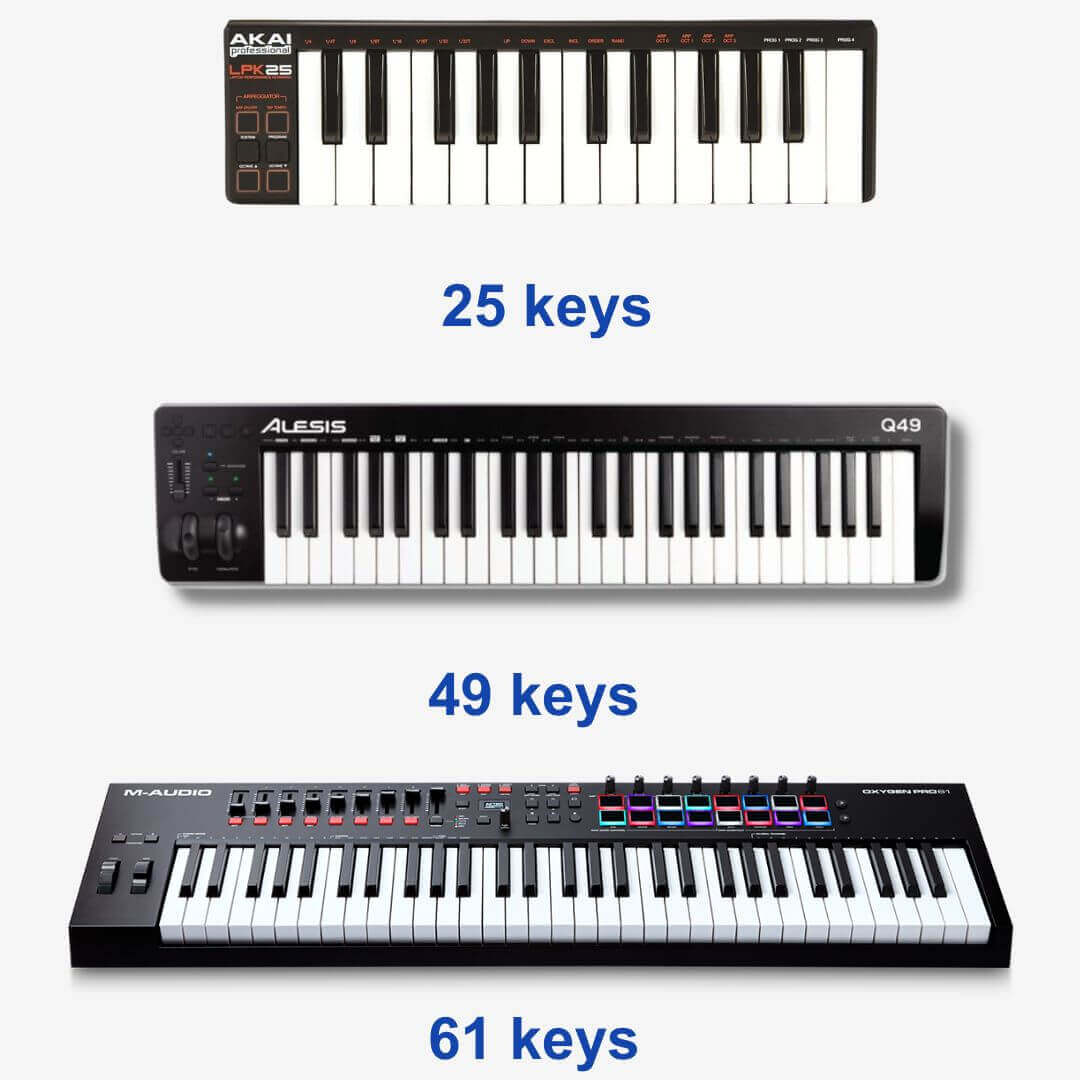
MIDI keyboards provide you with a number of keys that allow you to compose music with samples and virtual instruments.
They come in many sizes, but 25-key keyboards are more portable than others. These smaller keyboards provide “Octave Shift” functions that allow you to transpose the keys up and down in pitch.
MIDI keyboard sizes include:
- 25-keys (2 octaves)
- 37-keys (3 octaves)
- 49-keys (4 octaves)
- 61-keys (5 octaves)
- 88-keys (7 octaves)
Touchpads
Drum pads allow you to program drums and trigger samples and loops. Although you can do this with MIDI keyboards, finger-drumming with drum pads is much more fun.
Like keyboards, MIDI drum pads also come in different shapes and sizes. For example, see the AKAI LBD8 MIDI controller below.
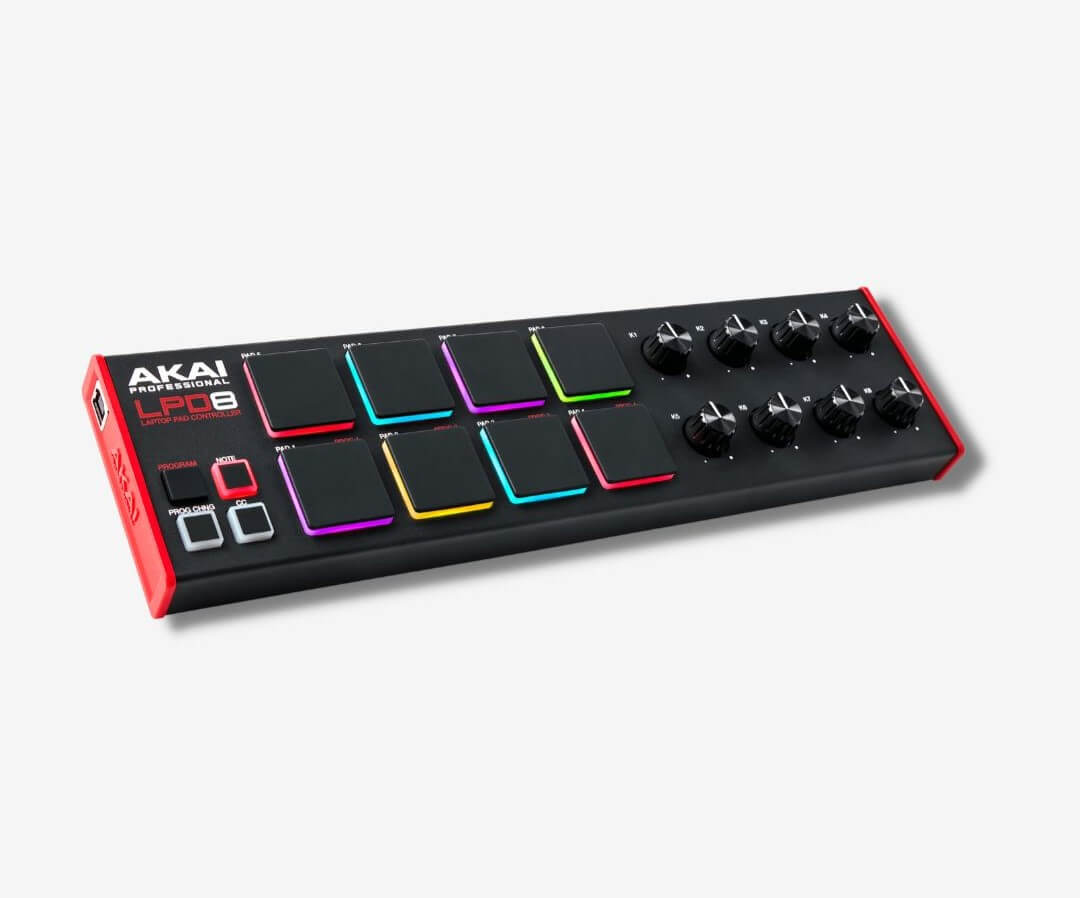
Image Credit: AKAI
The device features 8 pads, 8 knobs, and a couple of buttons such as Play, Stop, and other global controls.
The pads are perfect for finger drumming while the knobs allow you to control the settings of the virtual instrument you’re triggering with the pads.
Now, compare that with the Maschine Mikro 3 by Native Instruments.
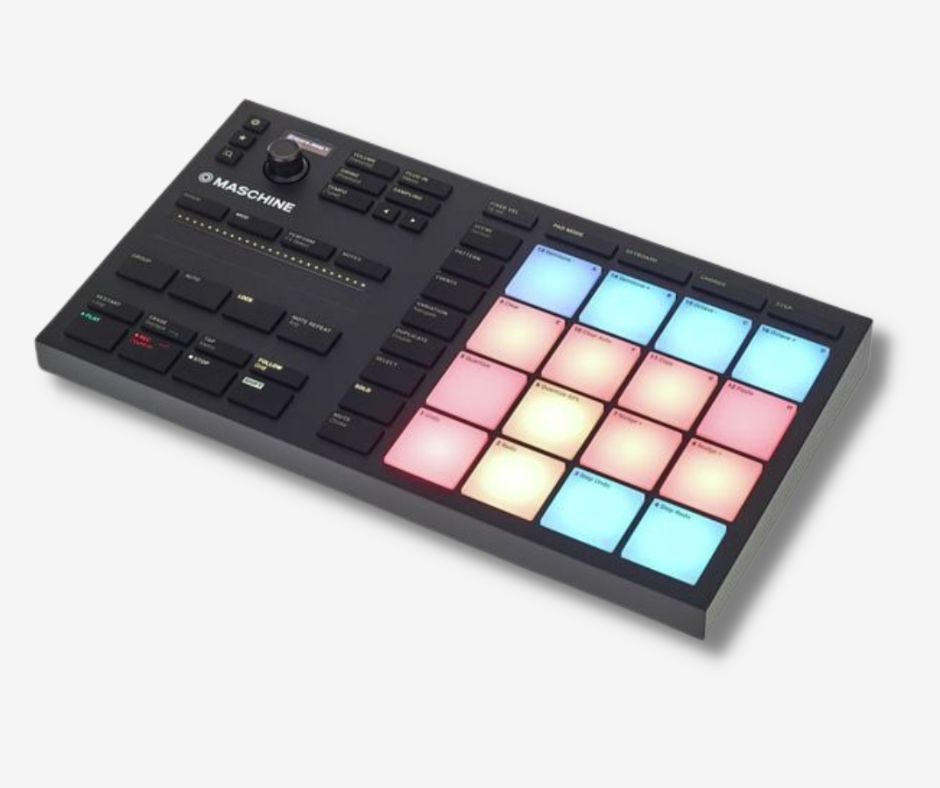
Image Credit: Native Instruments
It comes with more pads and more buttons, and it’s designed to work seamlessly with NI’s Maschine DAW software. The Mikro also comes with some cool MIDI functions like Chord Mode which we’ll be explaining soon.
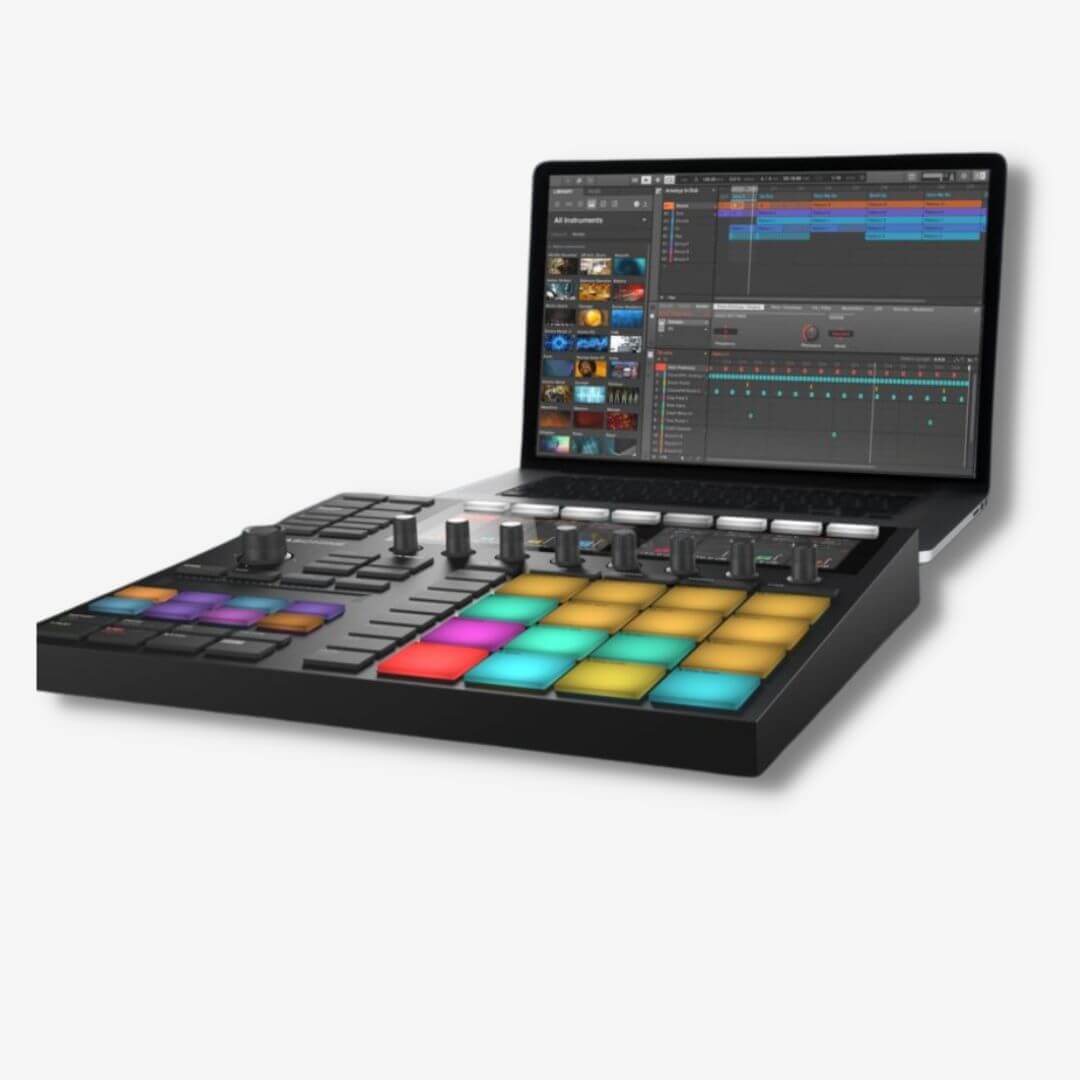
Image Credit: Native Instruments
Many developers like AKAI and Native Instruments design their MIDI hardware to integrate with their software. Though you can effortlessly control your DAW with many MIDI controllers, some controllers like the Mikro are better used with its dedicated Maschine software.
Then we have MIDI drum pad units like the Ableton Push 2 which are much bigger in size.
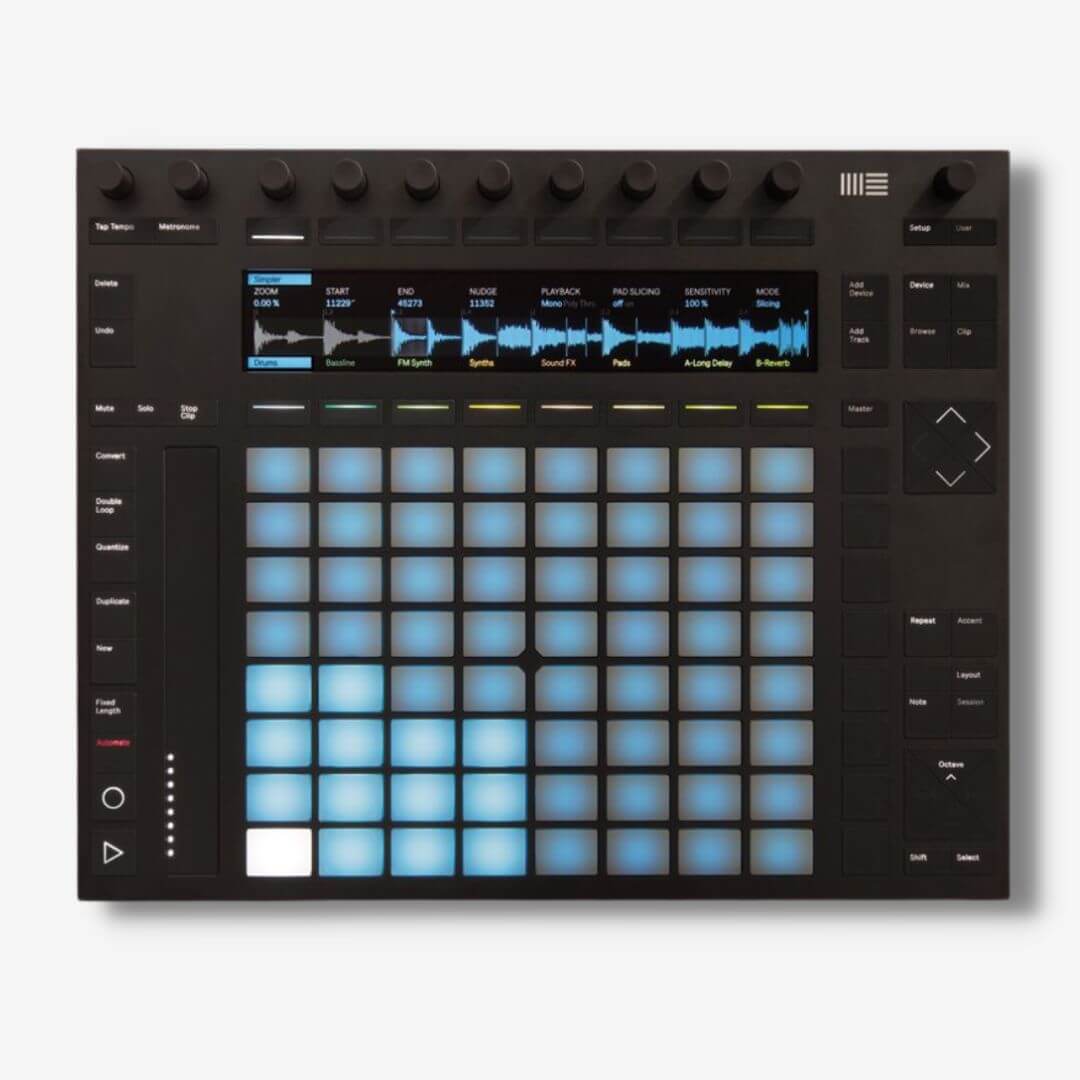
Image Credit: Ableton
The Push 2 is Ableton’s equivalent of the NI Mikro 3 for Maschine. It’s designed to integrate seamlessly with the Ableton DAW and puts every Ableton tool a producer needs at their fingertips.
Control surfaces
Finally, control surfaces are designed with controlling a broad catalog of DAWs and virtual instruments in mind.
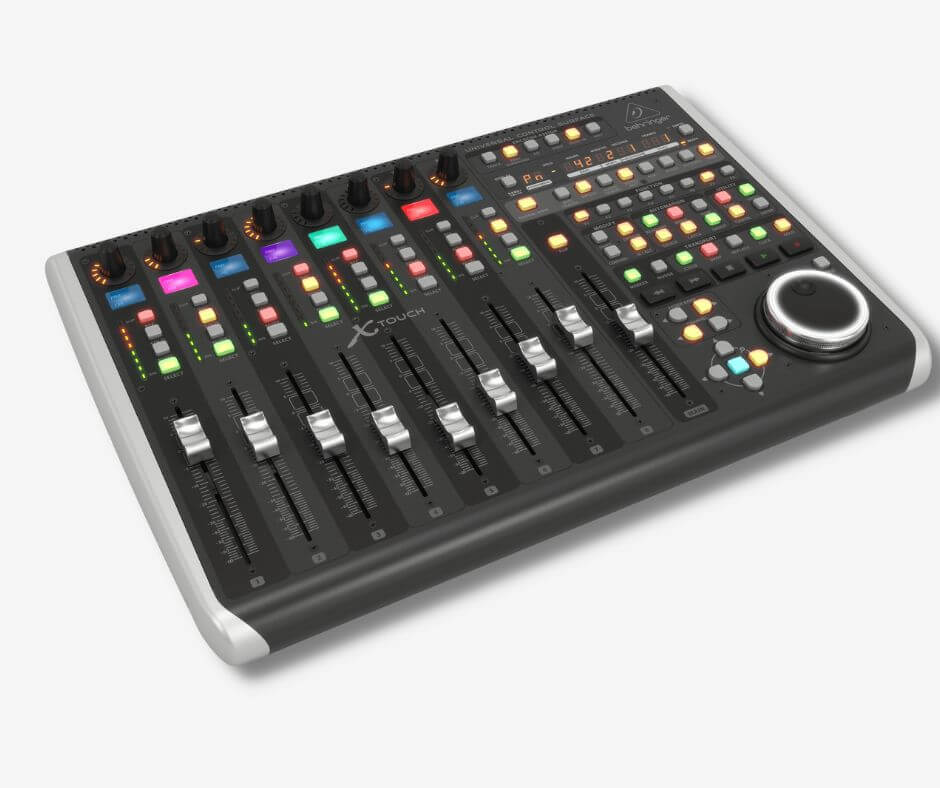
Image Credit: Behringer
The X-TOUCH looks like a miniaturized mixing desk, right?
Well, each button & mode on a MIDI control surface allows you to control different settings in your DAW software, and some integrate with virtual instruments and plugins too. Therefore, MIDI control surfaces are something like affordable mixing desks!
MIDI control surfaces use numbered MIDI CC messages to control different settings within the software.
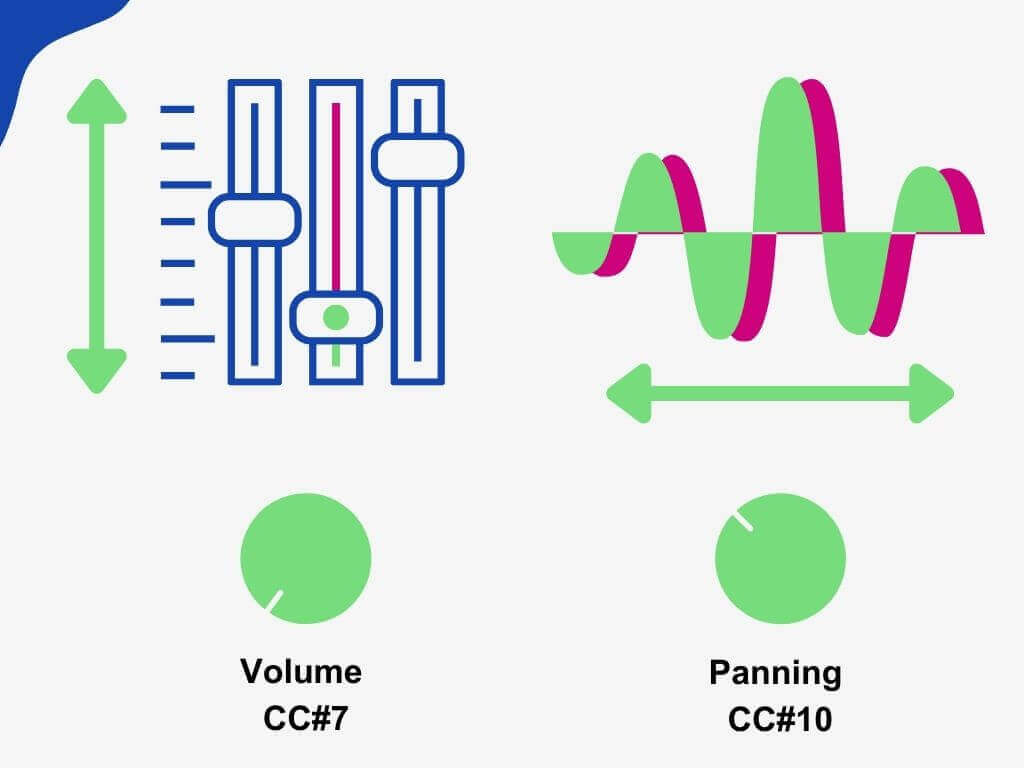
Don’t forget to check out the article below to find out more about how MIDI works!
Bundled software
Finally, companies like Native Instruments, Arturia, and AKAI offer big software bundles with their MIDI controllers. These software bundles can include plugins, software instruments, synthesizers, and entry-level DAWs too.
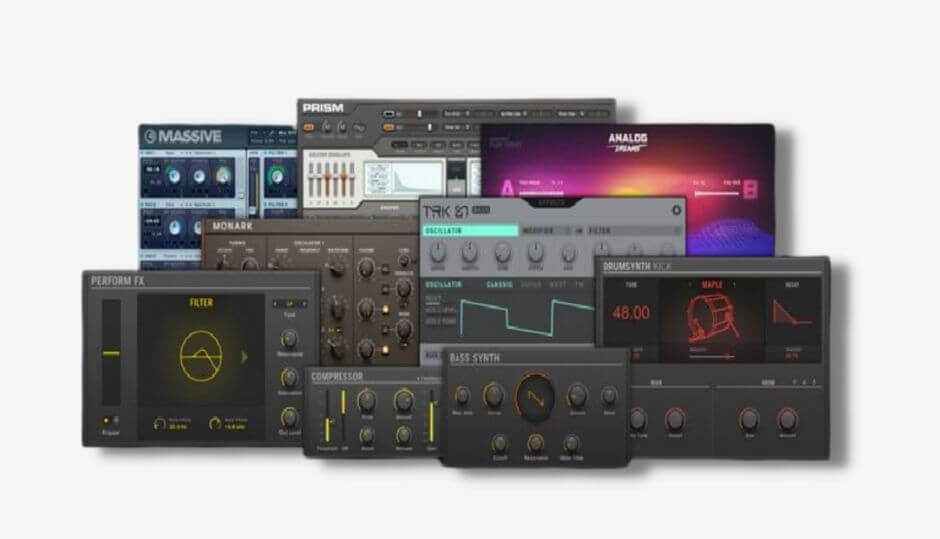
Image Credit: Native Instruments
Most software will be the manufacturer’s own, but many include third-party software like Ableton Lite.
A full house
Better yet, most MIDI keyboards have a combination of most or all of these features! For example, a lot of MIDI keyboards feature drum pads, knobs, and various MIDI modes.
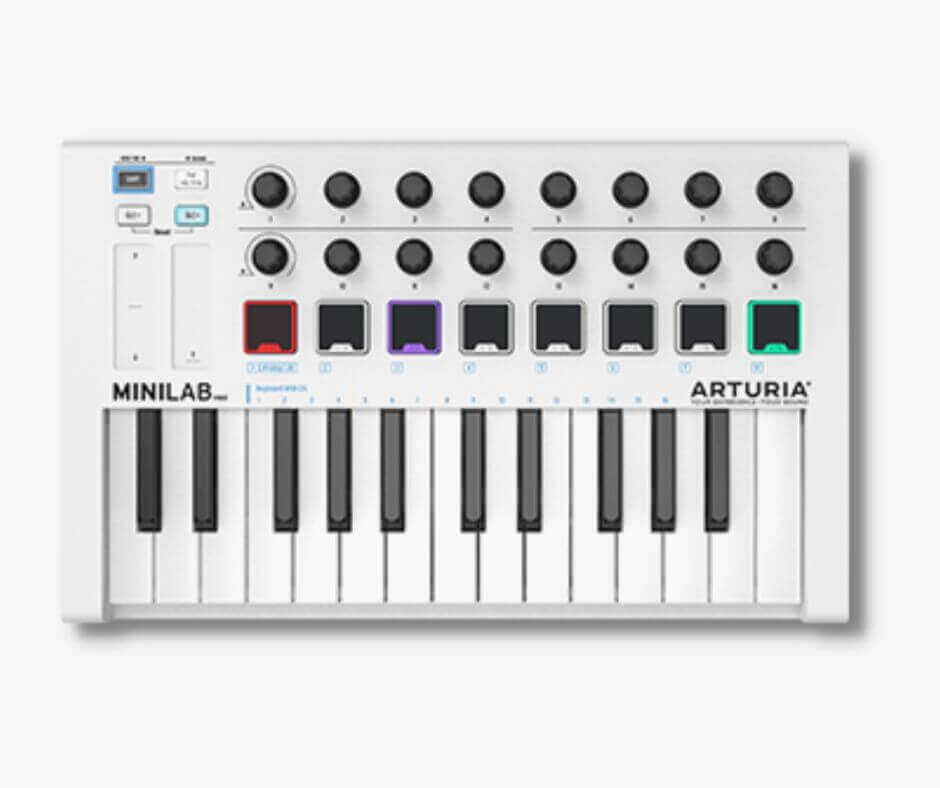
Image Credit: Arturia
Below are some examples of entry-level MIDI keyboards with these features:
- Novation Launchkey Mini MK3- best MIDI keyboard for beginners
- AKAI MPK Mini MK3
- ARTURIA MiniLab MKII
Chord modes
Additional features like chord modes are available on some MIDI controllers too. Found on controllers like the Mikro 3, chord modes allow you to write chord progressions with no knowledge of music theory. Simply select a chord mode (Major, Minor, etc.) then press a key and you have the corresponding chord!
Arpeggiators
Some MIDI controllers also utilize arpeggiators. An arpeggio is a broken chord, and an arpeggiator utilizes time signatures to create a melody with various rhythmic patterns of the individual chord notes.
Consequently, you can create cool melodies by pressing just a few notes!
Sequencers
Traditionally a dedicated hardware piece, it’s not uncommon to find sequencers on MIDI controllers.
A sequencer allows you to program notes (known as steps) across musical bars. Some allow you to map notes across 8 steps, while others 16 or 32.
There are 16 steps in a 4/4 bar. So an 8-step sequencer allows you to plot notes across half a bar while a 16-step sequencer allows you to plot notes across a whole bar.
9. Additional software (software instruments & synthesizers, plugins)
Next, let’s talk some more about virtual instruments and plugins that musicians and producers use.
Software instruments
Software instruments are virtual emulations of acoustic instruments. They generate a signal with pre-recorded sounds, so when you press a key you’re triggering a sample of a real instrument.
Therefore, software emulations of an acoustic instrument use a collection of samples to recreate the sound of that instrument.
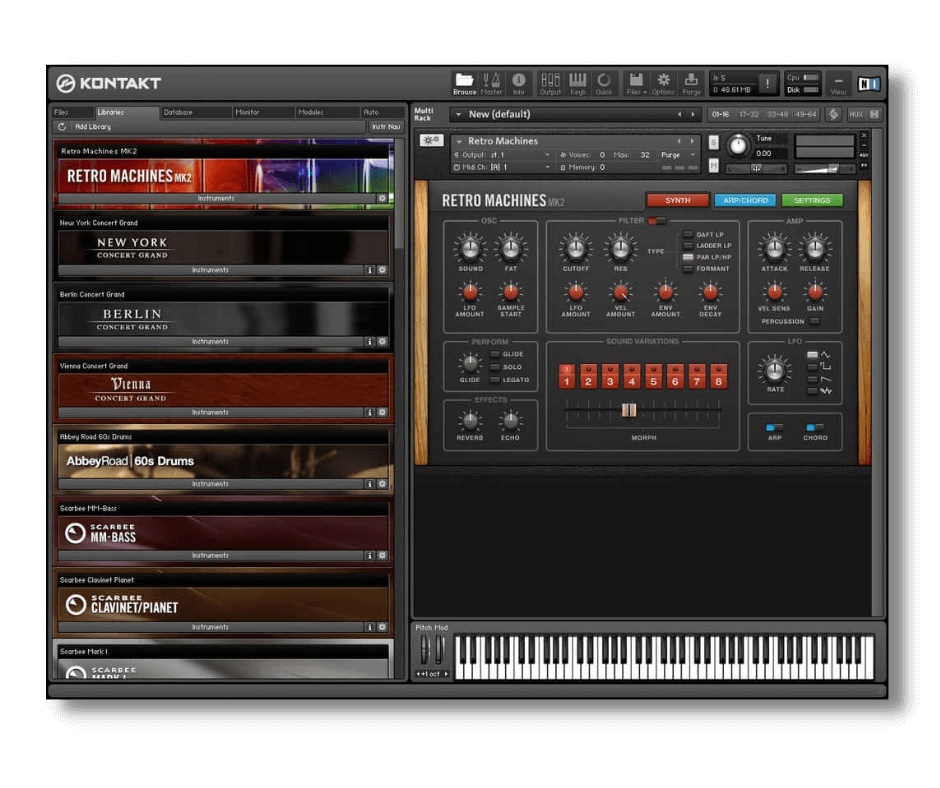
Image Credit: Native Instruments
Developers of virtual instruments build this sample-based music software by recording musicians playing real instruments. Then, they convert those recordings into sample libraries.
Examples of software instruments:
Software synthesizers
In contrast, software synthesizers primarily utilize algorithms to generate a signal, but some do offer sample-based synthesis too. But the different parameters on the synthesizer’s interface allow you to shape that signal even further.
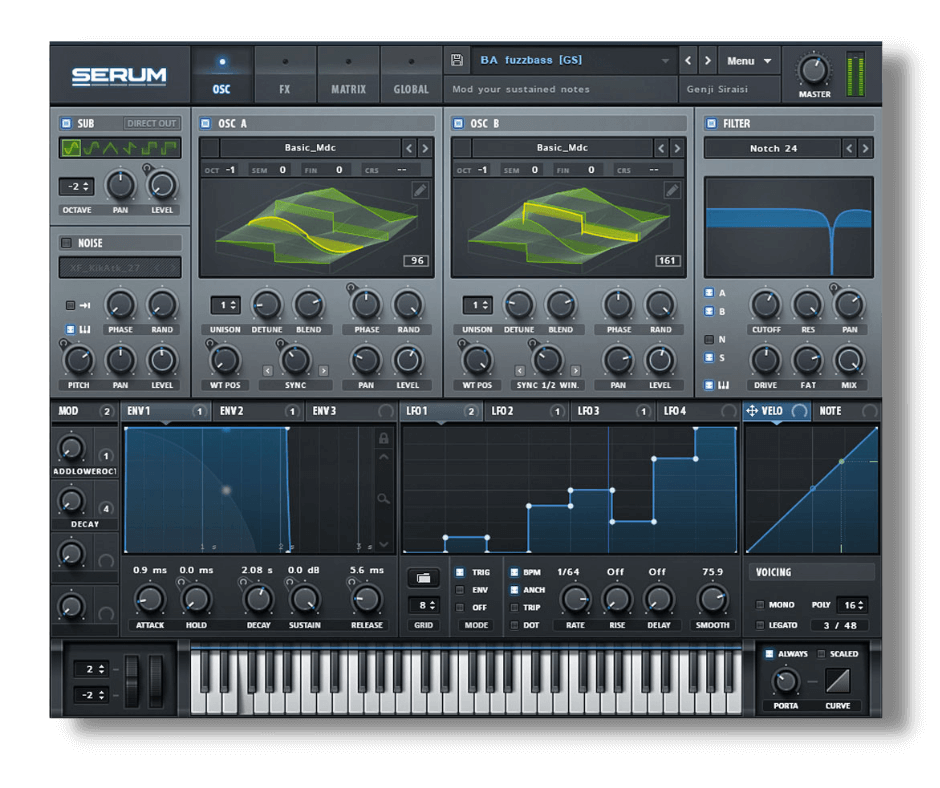
Image Credit: xFer
In other words, the sound design process starts with a digitally generated sound of a fundamental waveform as a basic building block. Then, you can add more waveforms and manipulate them in countless ways with the controls and features on the synthesizer’s interface.
But there are numerous types of synthesis. In the image above sits Serum – a wavetable synthesizer.
Other methods of synthesis include:
- Subtractive synthesis
- Additive synthesis
- FM synthesis
- Granular synthesis
Below are some examples of different synthesizers that utilize different synthesis techniques:
- Serum (wavetable synthesizer)
Developer: xFer
- FM8 (FM synthesizer)
Developer: Native Instruments
- Pigments (multiple synth engines)
Developer: Arturia
- Palindrome (granular synthesizer
Developer: Glitchmachines
Plugins
Finally, plugins are creative effects that don’t generate a sound of their own. Instead, we insert plugins onto audio channels to manipulate those sounds.
There are thousands – if not millions – of third-party plugins available. With that said, all DAWs feature stock plugins and virtual instruments that are good for beginners. But you will inevitably begin to use third-party plugins at some point in your journey…
Moreover, you can experiment with many free third-party plugins before spending a penny on others!
Let’s take a look at some plugin effects in closer detail.
EQs
An EQ (equalizer) is a tool that allows you to increase or attenuate the level of the frequency band in an audio signal. Emphasizing or removing frequencies allows us to shape sounds and clean them up.
Most EQs utilize linear processing which means the signal will leave the EQ in the same shape as it is entered unless you adjust any settings in the plugin.
There are numerous types of EQs including dynamic and graphical EQs, but parametric EQs are most common among producers today.
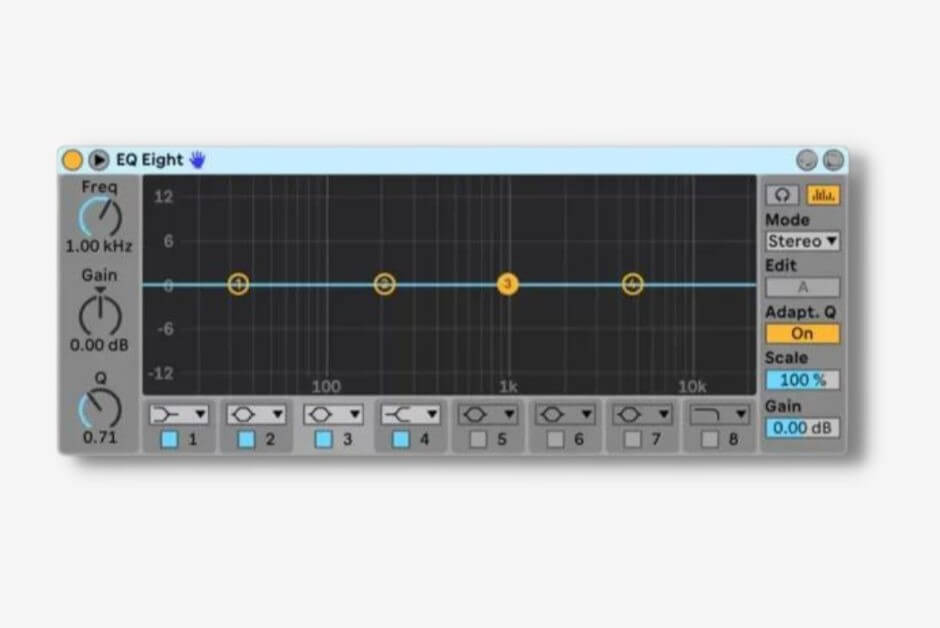
Image Credit: Ableton
Parametric EQs provide a more hands-on workflow where you can make very specific adjustments to frequency bands. On the other hand, dynamic EQs utilize compression settings to emphasize or attenuate frequencies when certain conditions are met in the signal.
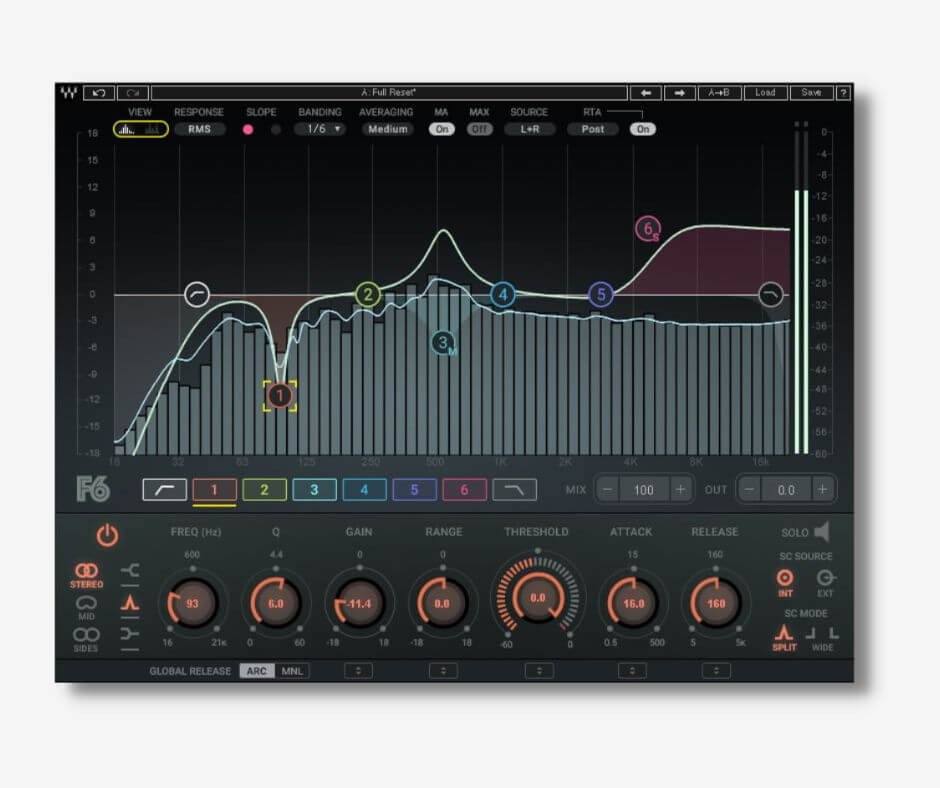
Image Credit: Waves
Compressors
A compressor allows you to adjust the dynamic range of an audio signal – the difference between the loudest and quietest parts of the signal.
In practice, you can use a compressor to keep a consistent level across all of your audio channels. But there are multiple ways of using compression for different results too!
- Parallel compression is compressing a duplicated signal and blending it with the original.
- Serial compression is using minimal settings on a chain of compressors rather than using big settings on one compressor.
- Sidechain compression is attenuating the level of one audio channel as another channel triggers.
- Multiband compression is compressing various frequency bands within a signal (akin to dynamic EQs).
- Limiting sets a maximum level that an audio signal cannot breach.
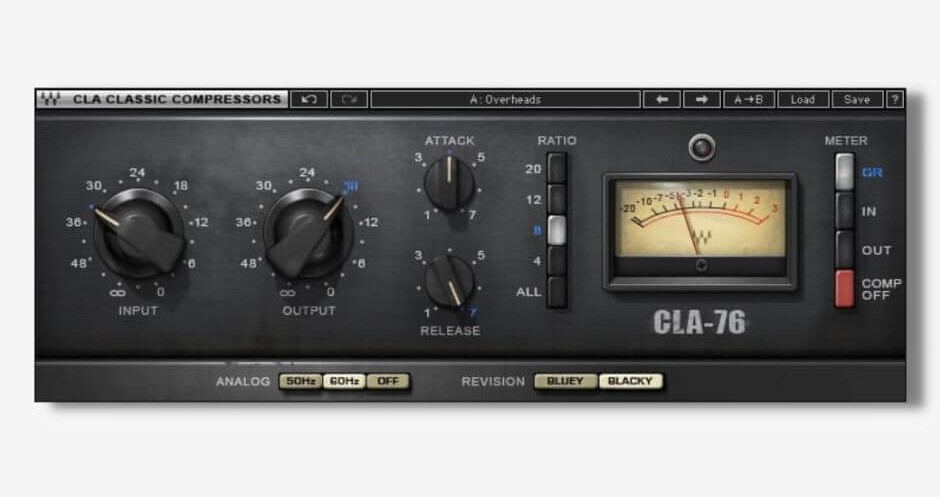
Image Credit: Waves
Compressors and EQs are important tools that allow us to keep our signals under control. In fact, you may use both of them more than other plugins from time to time.
Reverbs
Reverb is a creative effect that puts a sound in a space, meaning it synthesizes the effect of sound reflecting in a room.
A reverberating signal repeats thousands of times in less than 50ms which makes the actual sound itself sound bigger.
Different reverbs synthesize the effect in different spaces too. For example, plugins offer different spaces like ‘Room, ‘Hall’, and ‘Chamber’.
These three examples have different rates of reverb. The Chamber reverb sounds much bigger than the Room reverb because the stone construction in a chamber is super reflective.
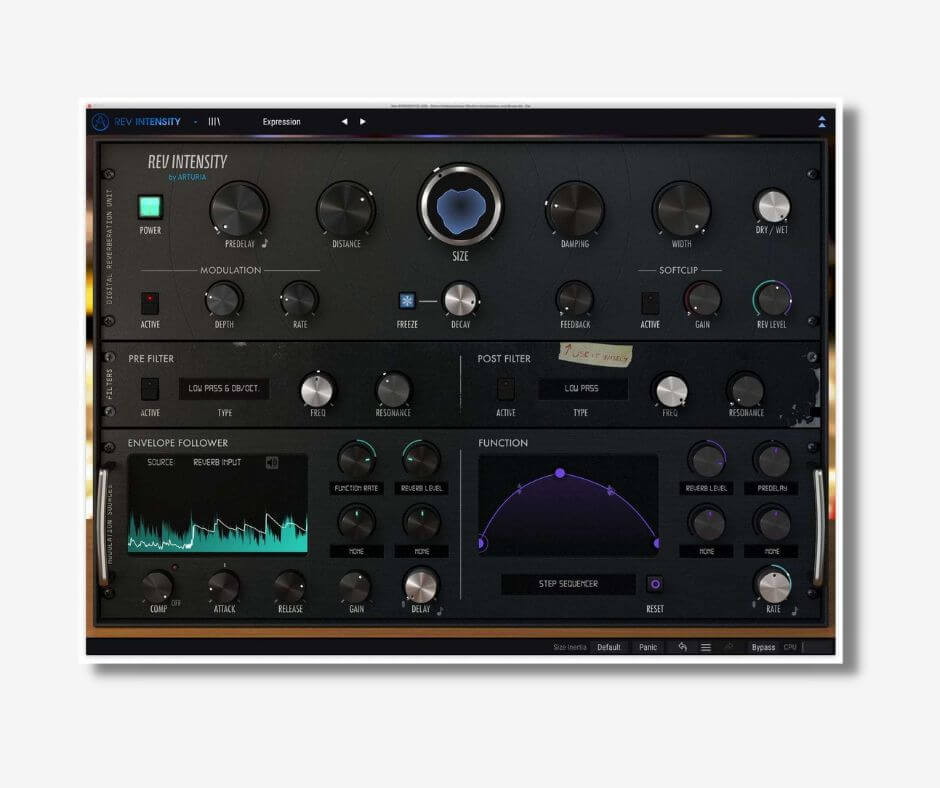
Image Credit: Arturia
So, reverb plugins take into account reflective materials found in these spaces too.
The main elements of reverb that you can control are:
- Early reflections (1 to 30 milliseconds)
- Body (30 ms onwards)
- Decay (reverb tail)
Delays
Like reverb, a delay effect is a time-based effect that utilizes reflected sound. However, the rates of reflection are dramatically slower and sound more like an echo.
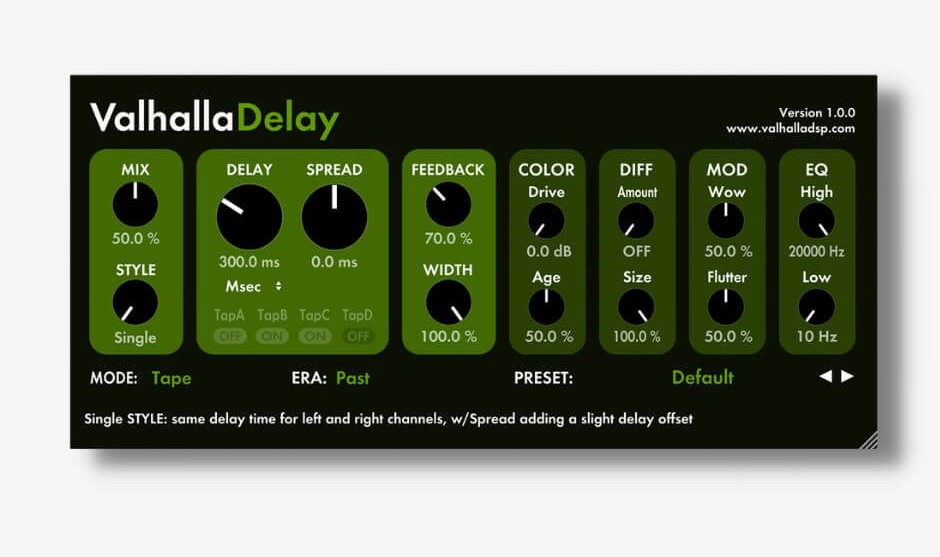
Image Credit: Valhalla
Unlike reverb, delay repeats a signal slower than 50ms per second. But, like reverb, delay still makes a signal bigger and adds depth too.
Distortions
Finally, distortion mathematically adds additional harmonics higher than the fundamental frequency (core frequency) of a signal. And distortion fits into two neat categories: even harmonics and odd harmonics.
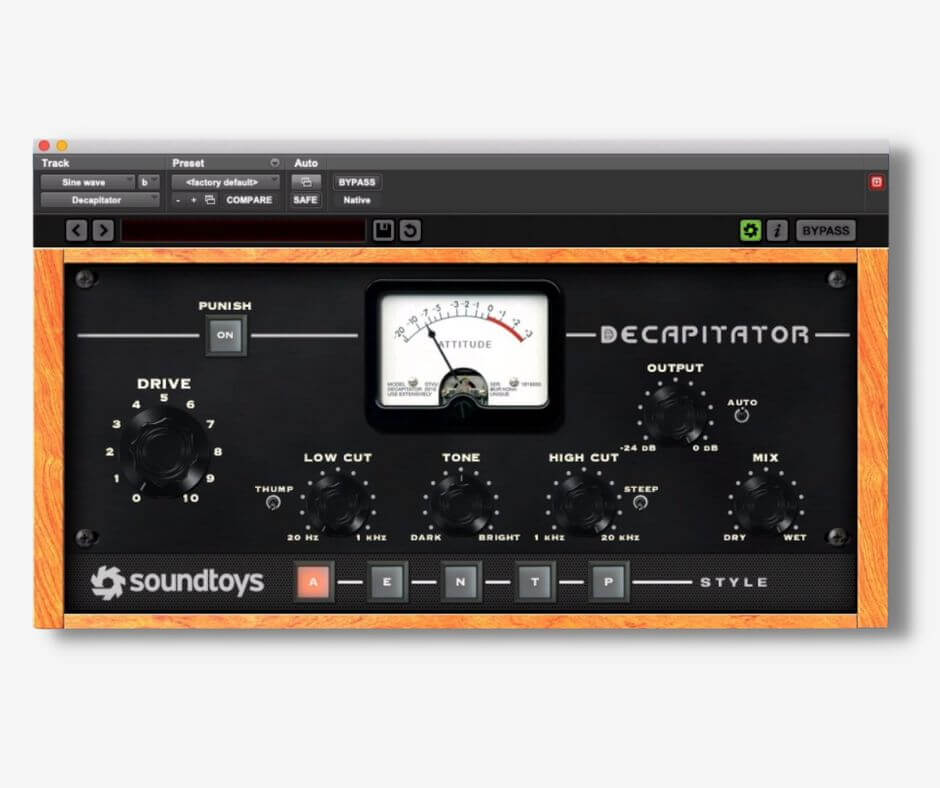
Image Credit: Soundtoys
Even distortions like tube distortion add harmonics at even multiples of the fundamental. For example, if the fundamental frequency is 200Hz, tube distortion adds new harmonics at 400Hz, 600Hz, and so on.
In contrast, odd harmonic distortions like phase distortion add harmonics at odd intervals. Sticking with our 200Hz example, phase distortion adds harmonics at 300Hz, 500Hz, etc.
- Even distortion adds harmonic overtones at intervals 2, 4, 6, 8, and 10
- Odd distortion adds harmonic overtones at intervals 3, 5, 7, 9, and 11
Now go quench that thirst to find plugins with this list of plugin developer websites…
10. Samples and sound effects
The last thing we’re going to cover is samples.
Samples are segments of audio taken from a bigger piece of audio, and this is adequately called sampling.
If you’re going to be making beats and electronic music then you’ll need access to a range of pre-recorded sounds to manipulate in your music.
The three types of samples: one-shots, loops, and sound effects.
A one-shot is a singular instance of an instrument or sound – the most common one-shots are drum samples – whereas a loop can feature any instrument or sound playing a musical sequence. But sound effects can be anything in between!
Absolutely anything can be a sample and that’s why thousands of producers and musicians use sampling in their music every day. One-shots and loops can consist of any instrument imaginable, and anything can be considered a sound effect.
In fact, sampling has been growing in popularity for decades and today it is at the forefront of music and inspiring new genres like Lofi music.
And that’s where subscription-based samples come in. Due to the huge demand, there are places where you can download and keep multiple royalty-free sounds for a small monthly fee.
Those looking to dip their toes into sampling may find our Beginner tier a great starting point. You can download and keep 100 sounds every month for just $2.99!
Final thoughts: how much does a home studio cost?
A multiverse of creative potential awaits you in your own home studio. Whether you want to be a musician, a music producer, a session performer, a beat-maker, or simply record for your own amusement, a home music production studio creates a lot of opportunities.
However, the price adds up fast. Let’s first take a look at how much some entry-level basics may cost you assuming you use a free DAW:
- Computer/laptop: $700
- Audio interface: $150
- DAW: free
- Microphone: $200
- Microphone stand: $30
- Headphones: $100
It’ll cost you over $1000 for home recording basics if you don’t already have a computer. But if you do then it’ll only cost you about $300 – $500.
But if you’re going to only be making beats or electronic music then you only need to spend $200-$300 on headphones and a couple of virtual instruments if you already have a computer.
But the price creeps up when looking at studio monitors, MIDI keyboards, and more fund music gear.
In any case, remember to only buy what you need first. While some things like a computer, a DAW, a computer, and headphones are essential for a home studio, the rest is just eccentric fun stuff.
I have some advice to offer on this note. Start simple and treat music recording & production as a hobby – not a potential career.
Running before you can walk by trying to learn too much at once will only lead to burnout. If you take one step at a time, you can avoid:
- Overwhelming yourself
- Discouraging yourself
- Quitting because “you’re just not supposed to make music”.
These are the results of trying to learn too much too soon! Nurture your interest and don’t bite off more than you can chew.
So, how is your home studio looking?
Music producers use samples on a daily basis, and you can download 100 royalty-free one-shots, loops, FX & full sample packs right now for $2.99!


